Showing posts with label exterior. Show all posts

Rear Lights

We've always found the back-up lights to be poor (nonexistent) on our 2017 Sprinter, so we were glad to see that the Baja Designs S1S lights work so well for lighting up the rear of the van.  Tony & Wanda Loeza at San Carlos German Motor Works professionally installed them for us, including front and rear switches (see below). 


New front lighted switch for the driver (subwoofer knob shown on the left).


New rear lighted switch if you need lights when standing at the back doors.


It's now very bright when backing up or needing to get something done back there.


18-July-2021

New Headlights & Foglights

Our 2017 Sprinter had the original old-school halogen headlights from Mercedes, and we found them to be dim, yellowish, and something of a safety hazard. After envying all the bright, modern LED headlights that we see on the road, we consulted with Tony & Wanda Loeza of San Carlos German Motor Works, and they recommended (and installed) the following:

  • LED Headlight Lowbeams: Lasfit Pro-G2
  • LED Headlight Highbeams: Lasfit Pro-MB1-N
  • LED Foglights: Morimoto LED 2Stroke 3.0
After using them for a month or so, we can see a very big difference and a much improved ability to see at night. Also, when replacing the halogen bulbs with LEDs, the Sprinter's electronic system will normally complain that a bulb is burnt out every time that you turn on the headlights. However, Tony & Wanda were able to purchase a software patch for our van that removes that warning - - contact them for more information.


18-July-2021

Porch Lights in Black

It was finally time to convert the chrome porch lights to black ones, as they should have been all along. Some people like to repaint their existing lights, but I bought new ones in black, and applied the new black bezels to the old lights. I also cleaned up the rust areas underneath, following these nice video instructions from Owl Vans.


14-May-2021

Grey Water Cap Replacement

I decided to replace the original 3" grey water cap with a new one that provides a 3/4" hose attachment. This allowed me to jettison the big 'slinky' 3" hose with a smaller, 3/4" expandable hose that takes up much less space in the grey water hose carrier. Now I can use that new space for other stuff, like trowels, tank supplies, etc.


15-March-2021


Upgrading the Suspension

After driving the van for 2.5 years, I was very familiar with the top-heavy wobbling of the van on curves, washboards, and other bumpy terrain. I read many recommendations to upgrade the suspension to improve handling, and after conferring my with trusted advisors at San Carlos German Auto Works, I opted for the Van Compass suspension upgrade.  They have recently changed their naming conventions, so I'll avoid calling it a 'Stage X', and just say that we installed the Fox shocks on the front and back, along with a Sumo spring in the front, costing about $2000. After doing this, I can see that the van's rear is about 1.5" lower in the back than in the front, so it may be useful to install the VC mini leaf spring in the rear as well.

The result is a van with better handling. Rather than wobbling through curves, it now seems to hug the road, carving through curves. The wobbles are greatly dampened, and the experience of riding in the van is more pleasant. 

In the front, the original shocks are left in place, and one more is added to each side, Here is a photo of the front driver's side, showing the new VC shock and its special mounting bracket, with the original shock shown at the right.


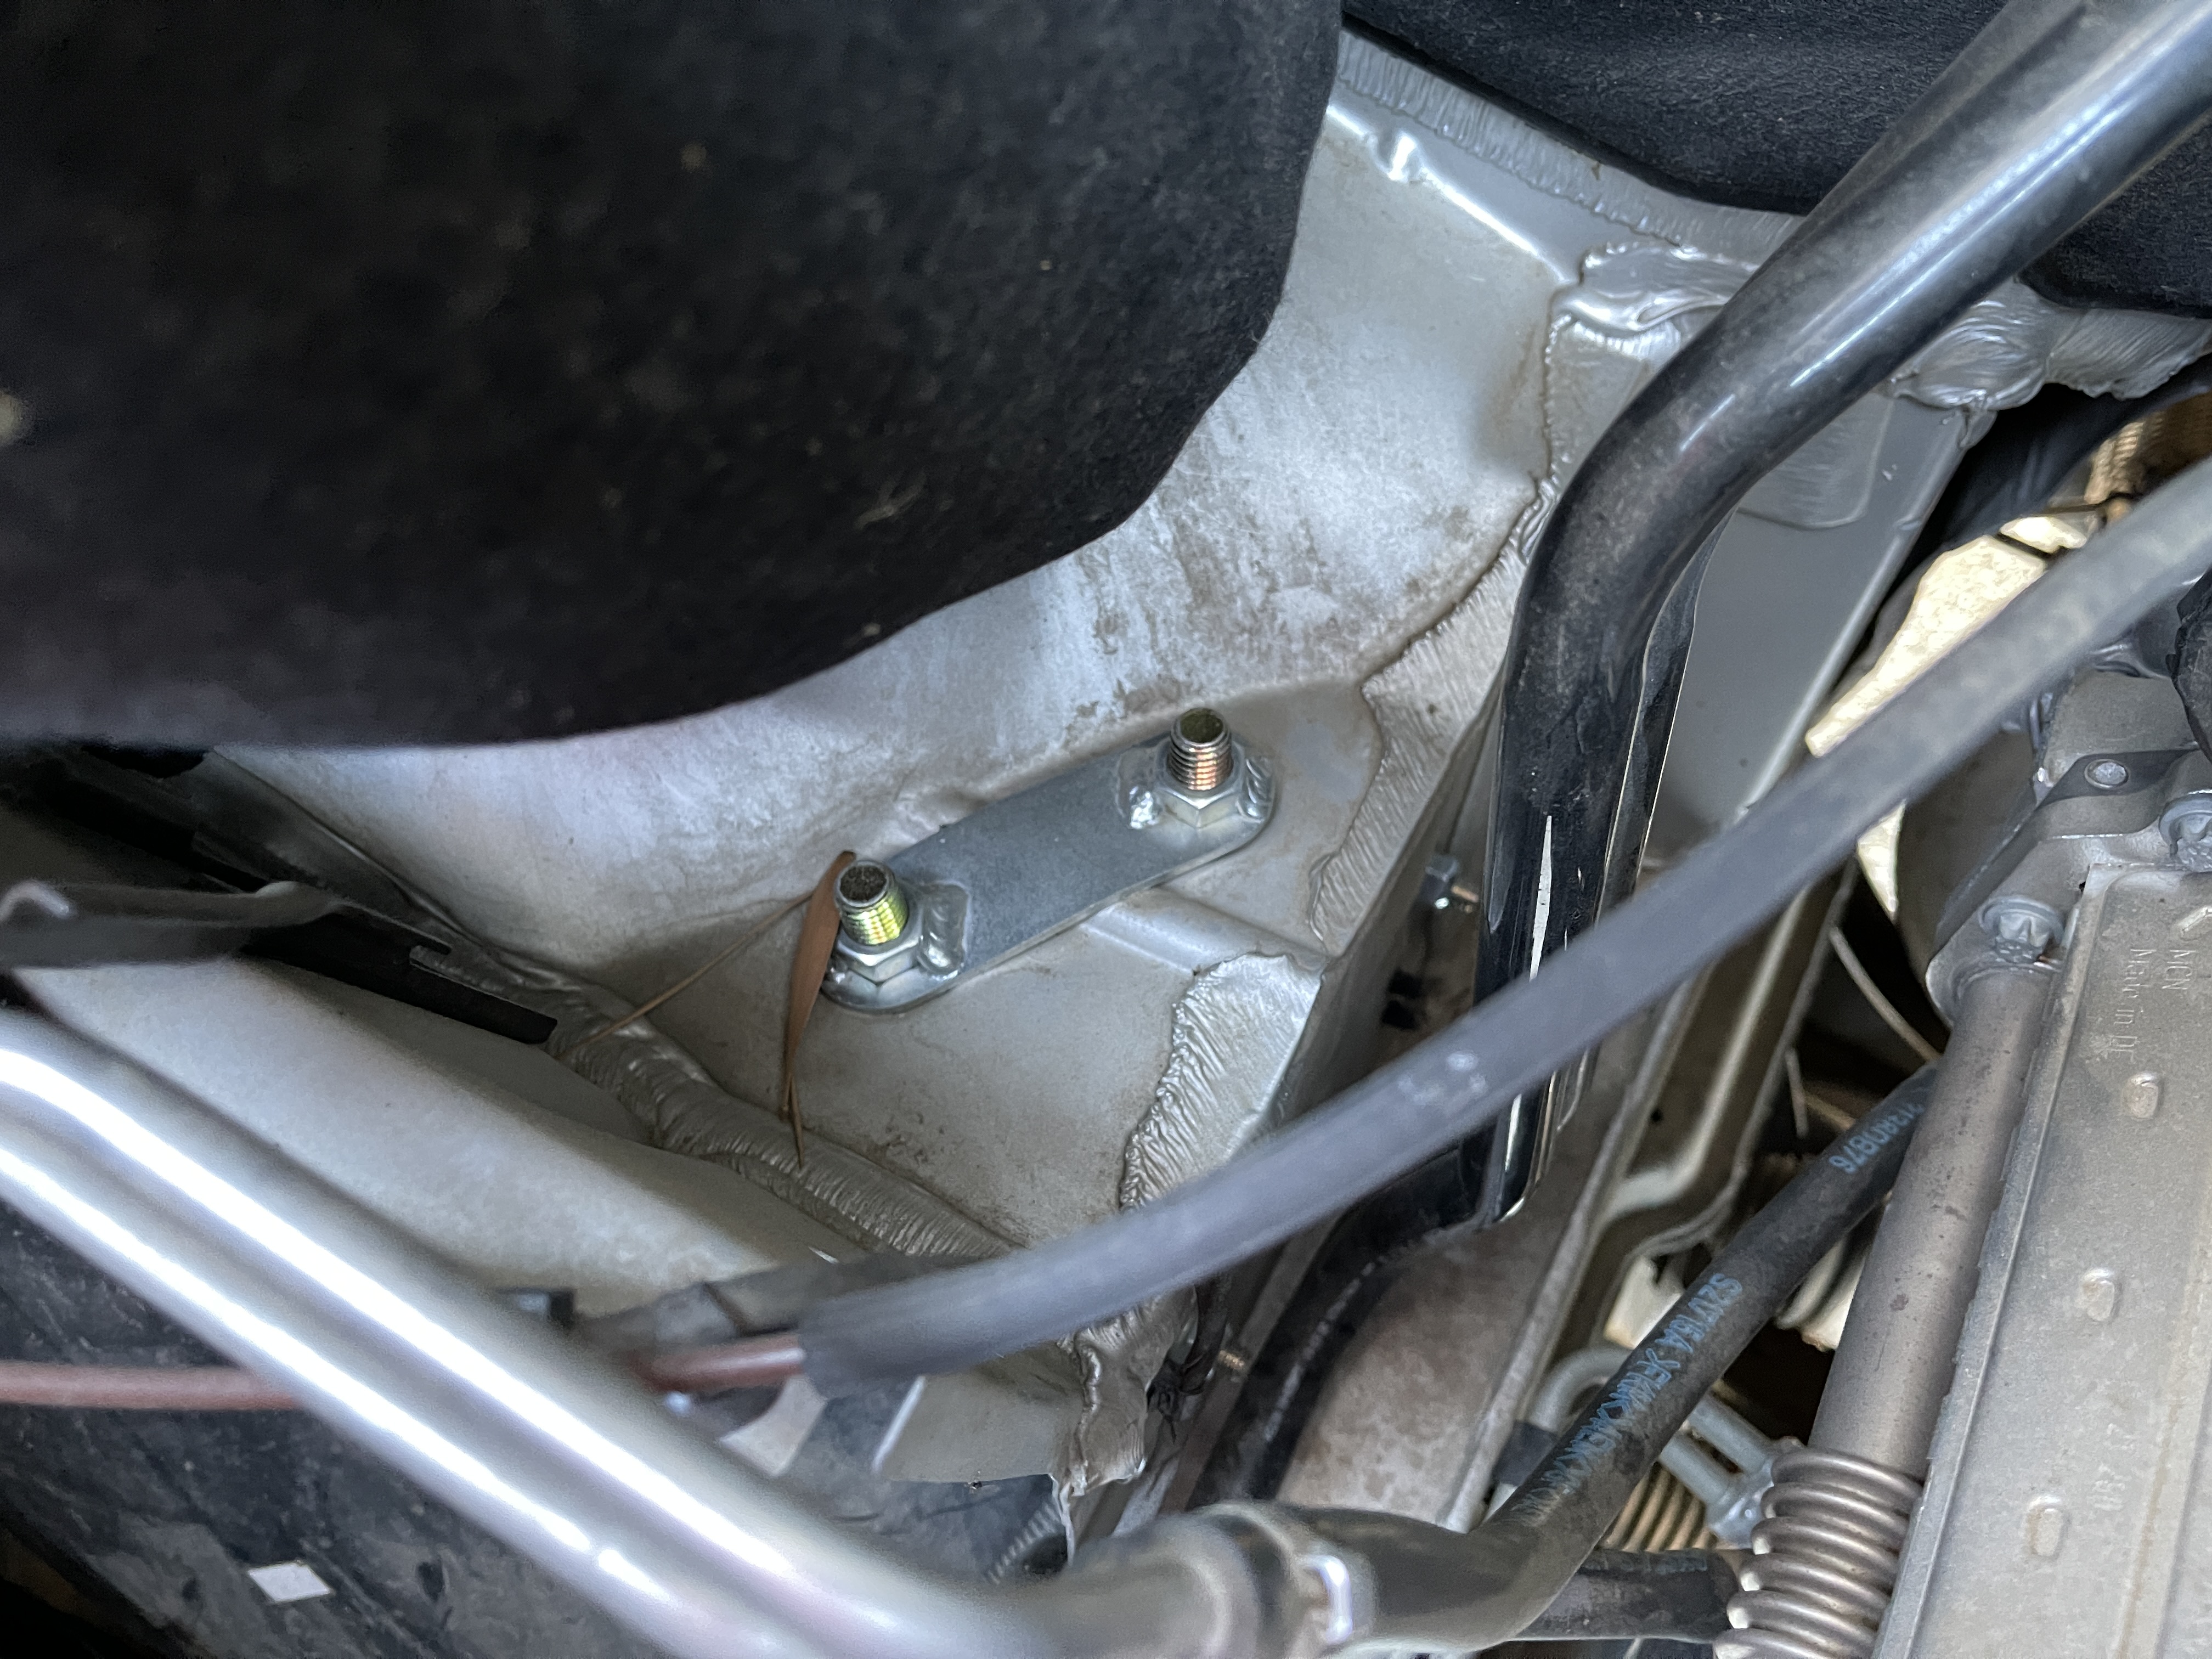
You can see the top of the additional shock mounting point from inside the engine compartment.


The rear shocks were simply replaced with the new VC shocks.


UPDATE July 2021

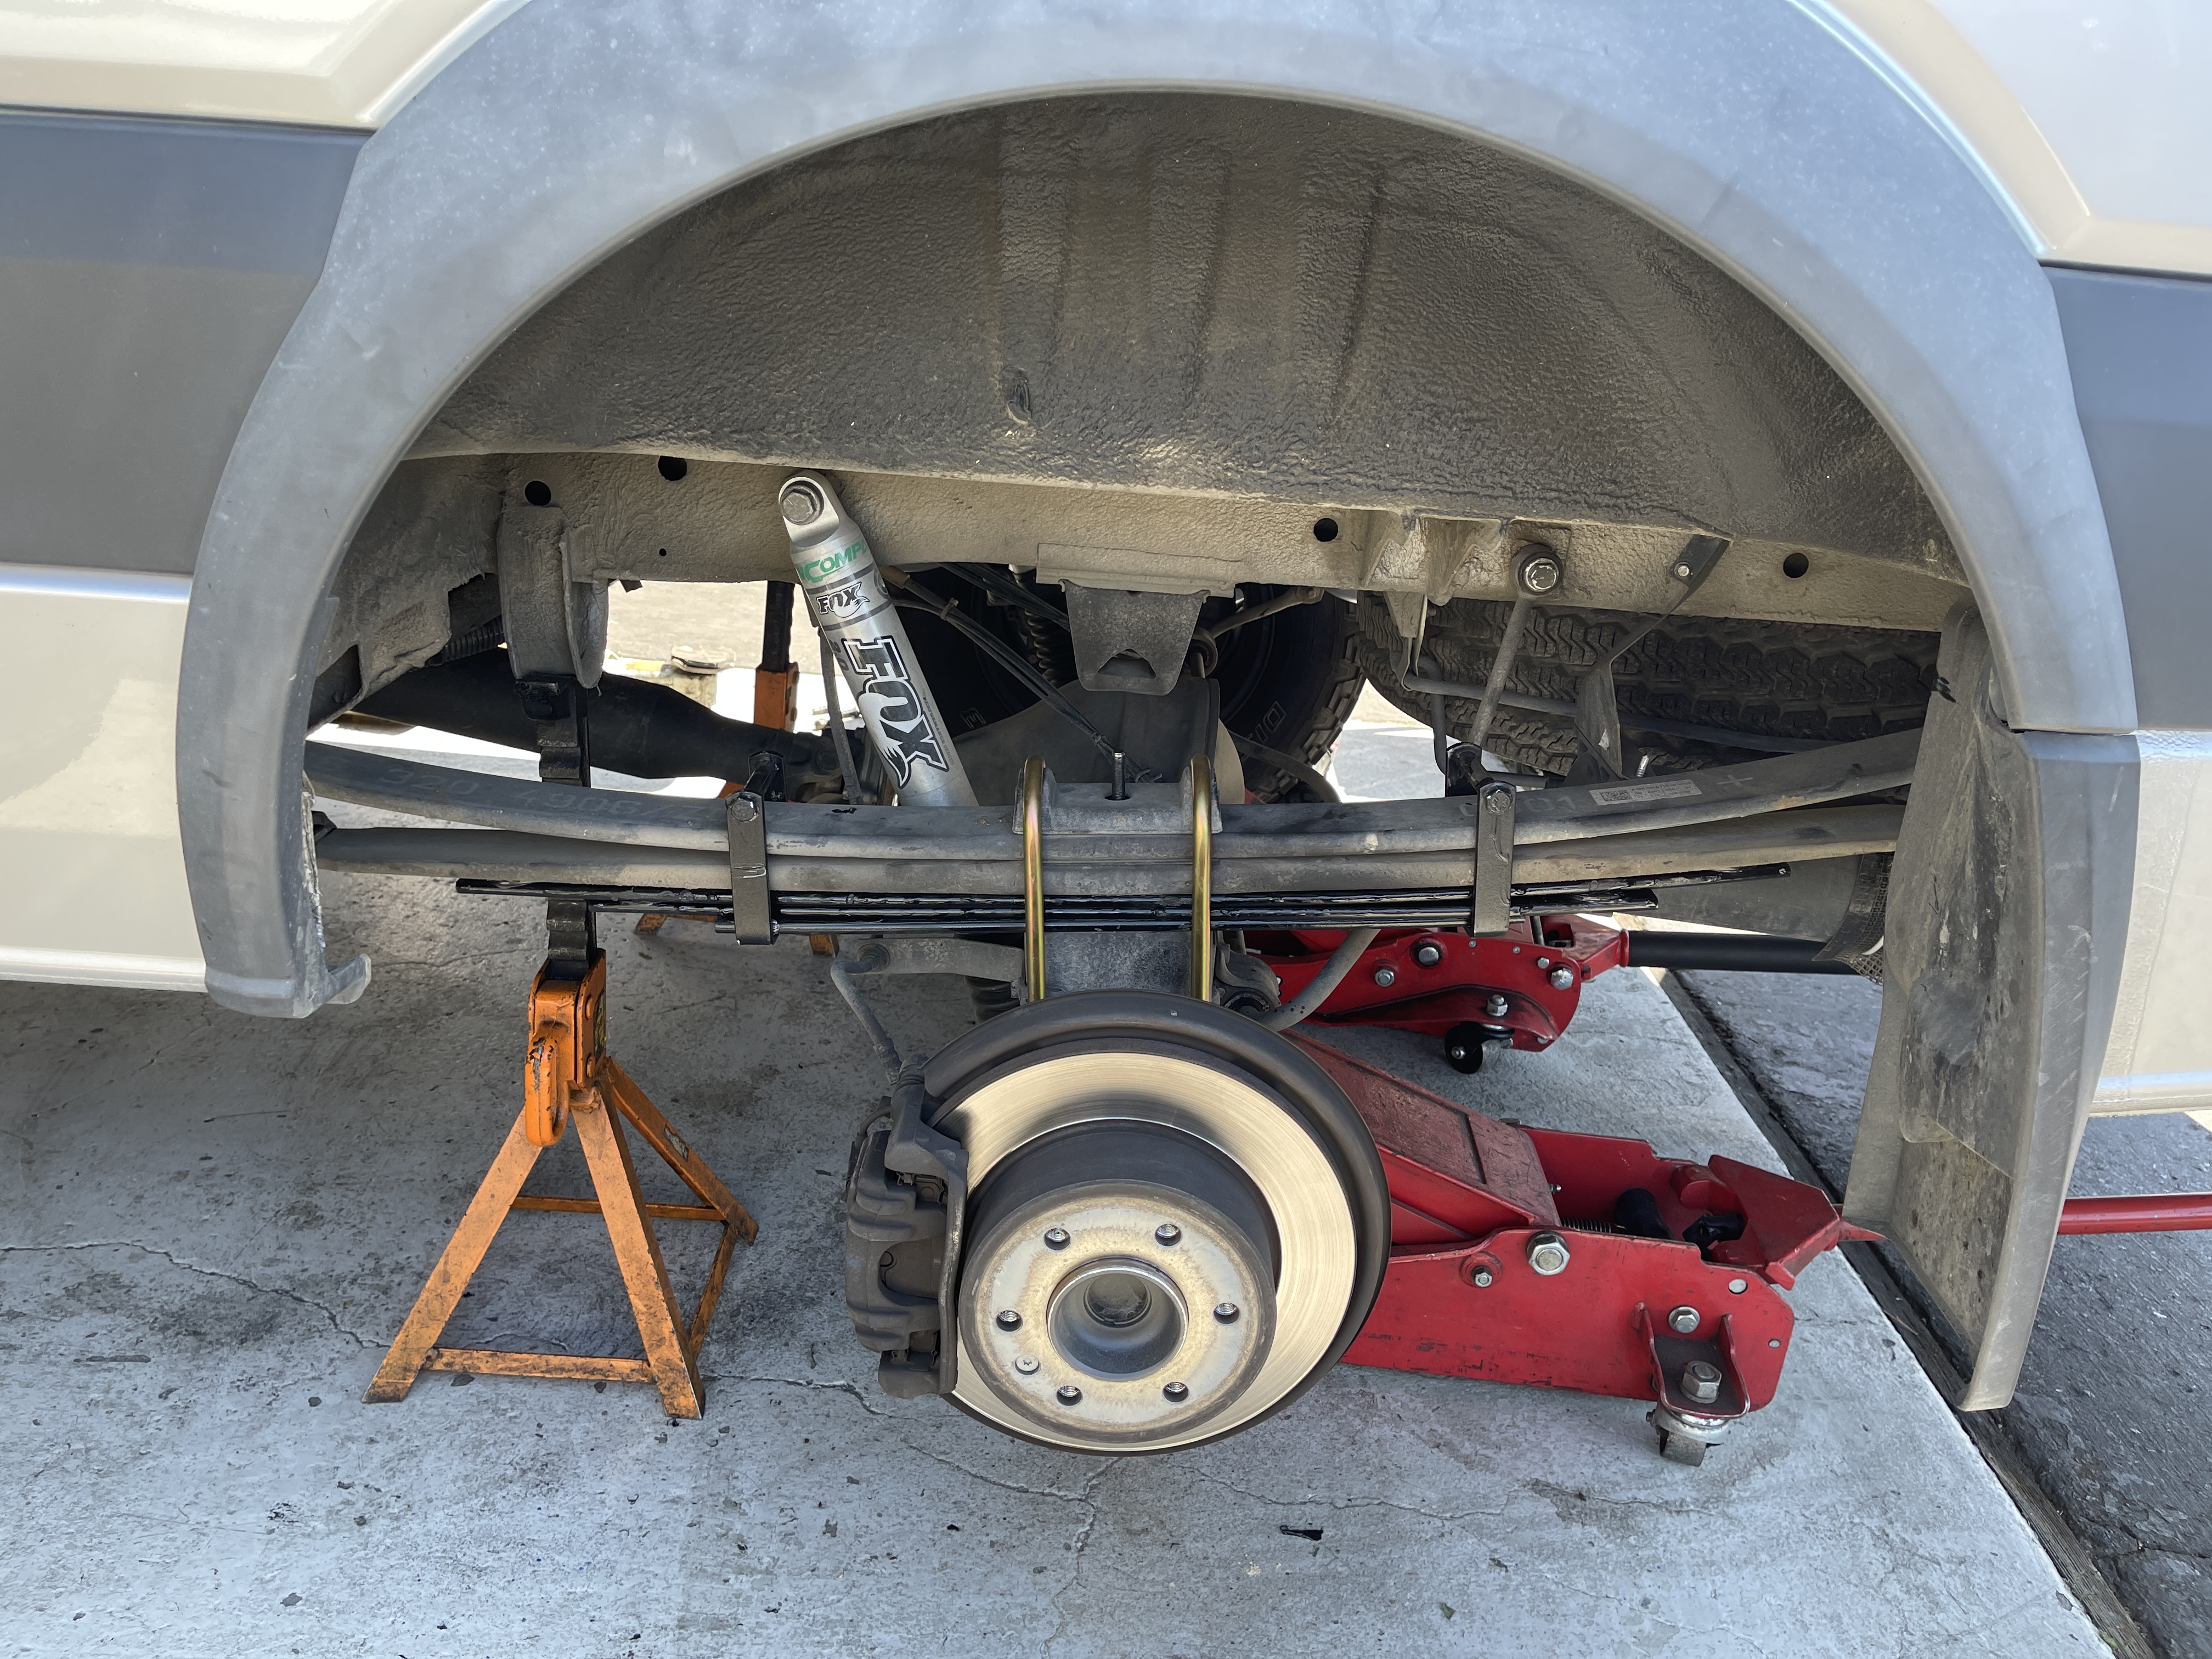
We finally got around to adding the rear mini-leaf spring to address the 1-2" sag that we were seeing in the rear. This cost approximately $800 with labor in California.

In this photo, the new leaf spring is the glossy black item beneath the older springs.


It seems that we gained about 2 inches of height in the rear, giving it the appearance of being slightly raked forward.


So, in summary, we installed 2 additional shocks in the front, 2 in the rear, a Sumo spring in the front, and the mini-leaf springs in the rear. Love the ride and the handling.

21-Sept-2020

Sticky Grey Water Valve

The grey water valve was getting difficult to open & close, so I found an interesting 10-minute fix for this. 

I drilled a small hole in the valve body, just off-center.


I got a can of white lithium grease with a small nozzle injector and filled the cavity with a fair amount of grease.


Then I worked the valve back & forth a bit until it was sliding well, and inserted an appropriately-sized screw. Works great.


4-Oct-2020

Sliding Door Noise Suppression

Our van's sliding door was making a lot of creaking and groaning noises when the body would experience torsion, like turning on a hill, going over a curb, etc.  I tried a lot of different lubrication ideas for all the door's contact points, and the combination of the following has knocked down the noise about 90%.

I used white lithium grease for most of the contact points, sprayed into a rag and wiped on with q-tips.


These mechanisms are sometimes referred to as 'pin cups'. I used white lithium grease on both the male and female parts.

Many people on the internet say that greasing this peg is very helpful for noise suppression. I did it, and it helped.


I used silicone spray on the surface of this rubber bumper.


And more lithium grease here.


16-October-2020


Painting the Rear Wheel Wells

I've never liked the shiny frame that was exposed in the (dark) rear wheel wells, and was glad to see an easy fix, compliments of a Revel 4x4 Facebook member.  I got some of this wheel well paint, masked off the tires, and used a single can for both sides. (I'd recommend using some sort of respirator with this stuff - - it got me high as a kite for a little while.)


I cleaned the wheel wells pretty well with some water and a brush, let it dry, and taped some packing paper over the areas where I didn't want overspray or drips. Goodbye silver frame...


Hello darkness, my old friend...


28-August-2020

Repositioning the Grey Water Hose

I occasionally use the grey water hose, but found that its factory-mounted location (to the right of the bumper hitch) impeded the installation of Mercedes' original exhaust system. I'm considering moving the exhaust to this spot, so I decided to move the grey water hose to the other side of the van.

The key insight is that the hangers for the hose are completely reversible, so it's easy to swap it to the left side.  

Hanger 2 is the one that has to be flipped around. This picture shows it in its original position, attached to one of the frame rails on the passenger side. There is an identical rail on the driver's side, so just flip the hanger and attach it to that rail.

The hangers are attached with self-drilling screws, so it takes some pretty good arm power to drive them into the rails, but it's doable.


28-July-2020

Table Leg Replacement

Following several others in the Revel Facebook group, I decided to replace the aluminum table leg with an adjustable strap for supporting the outdoor table. This allows adjustability when the Revel isn't parked on a level spot, doesn't require someone to retrieve the leg from inside, and doesn't require installation & removal.

  • Materials: 2" footman loop, 1.5" nylon strap about 5 feet long
  • Tools: Power drill, screwdriver
  • Time: 15 minutes
  • Cost: $15

I planned to buy a nylon strap for this project, but I had an unused 1.5" nylon strap from an REI duffel bag, so I used that. A better alternative may be this one (https://smile.amazon.com/dp/B07DVLX6MD/) which has a D-ring installed on the end.


To accommodate the 1.5" nylon strap I bought a 2" footman loop. (https://www.amazon.com/gp/product/B07B8BZ97R/).


I simply installed the footman loop just below the screen.


I kept the mounting plate from the original table and hooked around it with the other end of my nylon strap. A simple nylon strap with a D-ring attached would be a more elegant solution here.


I thought about adding some snaps or velcro spots to store it in place, but found that simply pinching the strap between the cabinet & table works just fine. I also store the loop end of the strap by wedging it to the left, where it won't bang around or rattle.


Jul-7-2020