Showing posts with label USB. Show all posts

Light Replacement with USB Ports

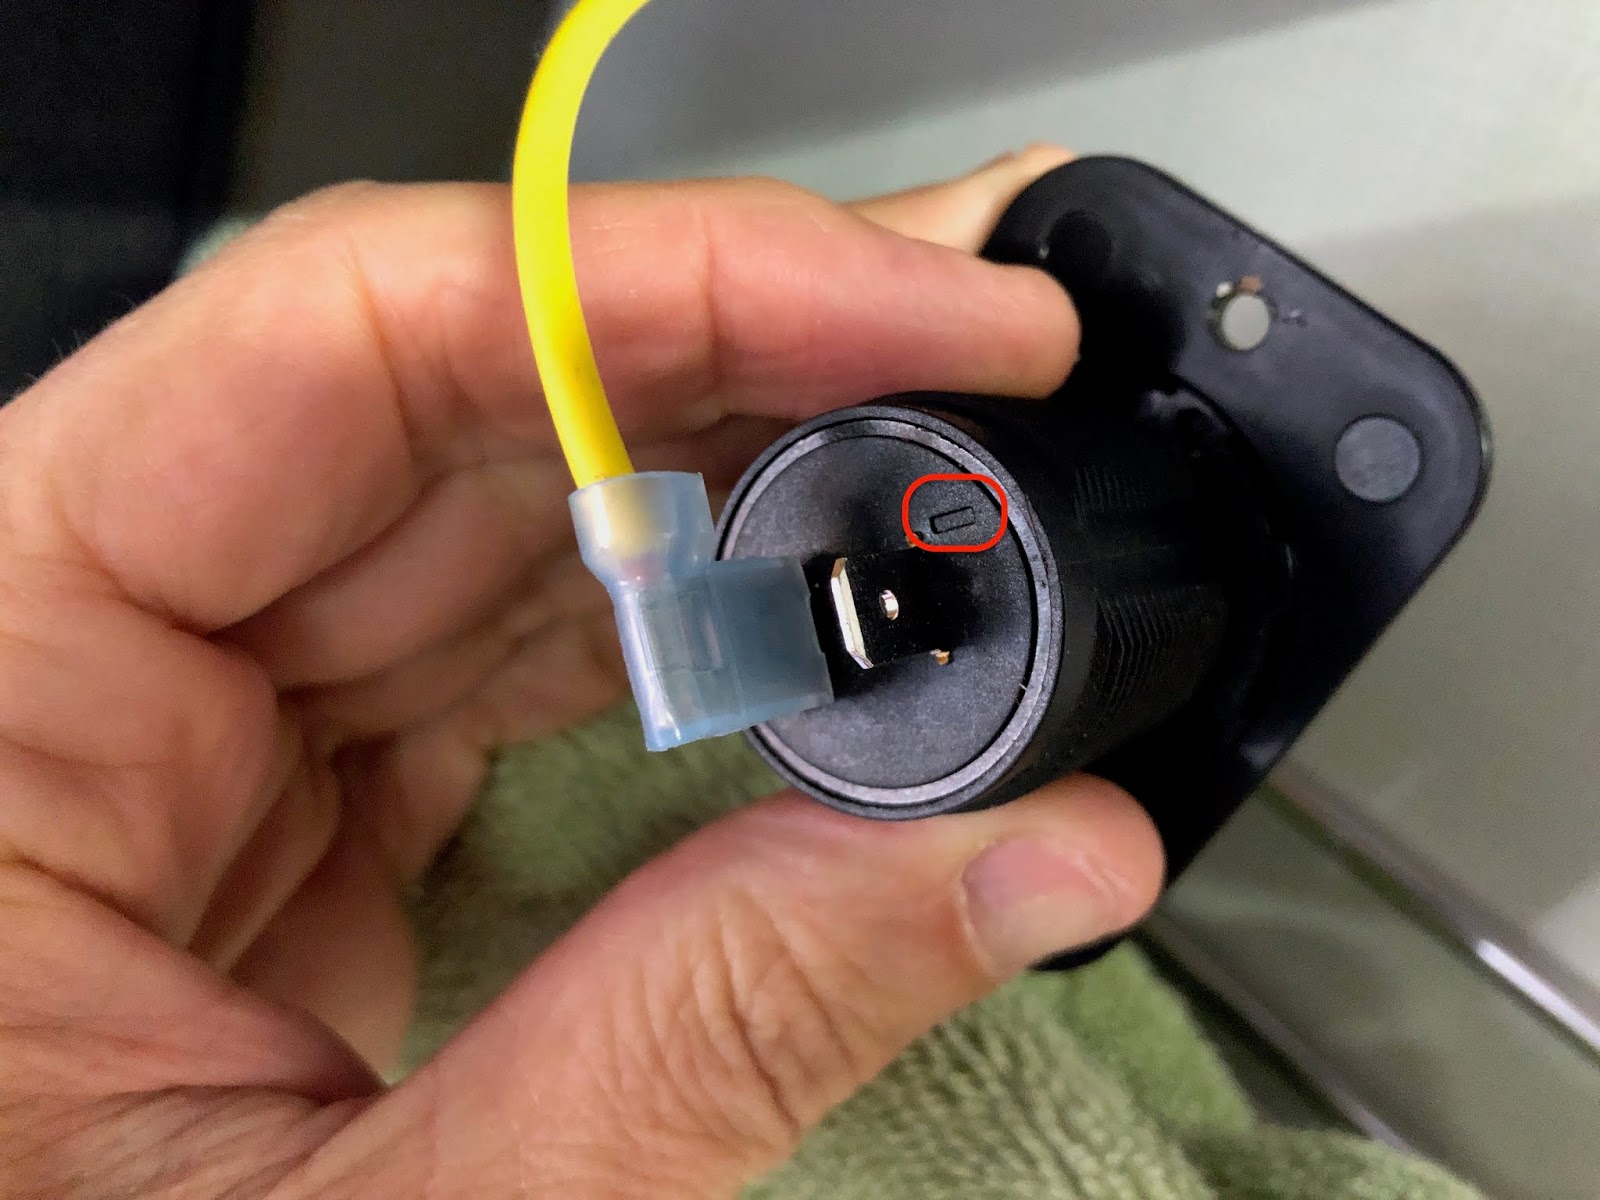
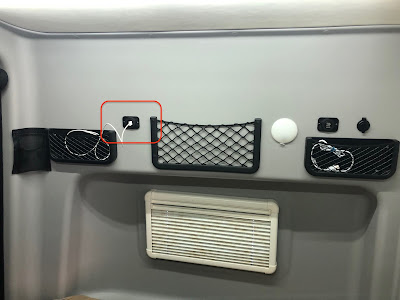
We don't need both of the puck lights in the bed area (we rarely use them at all), but we do need to charge our devices there with USB ports. I decided to remove one of the puck lights and replace it with a dual USB port. It was a trivial replacement - - just snip two wires, attach two new female spade connectors, and it's done.


12-October-2020

Mood Lighting for the Galley

We don't use our RAM mount under the galley cabinet, so I repurposed it for mood lighting. These inexpensive ($11) LED light strips fit perfectly into the slot in the RAM track. 


For power, I just tapped into the USB port a few inches away, and added a simple rocker switch for turning the light strip on/off. 


Oct-11-2020


Mood Lighting Switch

I've been looking for a cleaner way to organize the various strands of USB mood lights that I've mounted in the van, and was glad to find this $9 USB switch


I secured it with double-sided VHB tape to the panel directly behind the driver's headrest. 


This is a good location for managing and disguising the various cords that will be involved in this mod.


We don't use the RAM track above the galley, so I also installed this color-changing LED strip directly into the recessed groove, but left the color-changing controls easily accessible.


It's getting weird in here - - just the way we like it!

USB Upgrade & Nightlight

It's easy to upgrade Winnebago's factory-installed USB ports to provide faster charging (NB: for non-Apple devices!), and depending on which replacement model you select, you can get a nightlight with it, too.  I chose this model for about $16, and it took about 15 minutes to install. Here are the steps I took to replace the USB ports under the galley cabinet:


Remove the two screws in the USB port's faceplate.

Remove 4 screws inside the bottom of the dinette cabinet, along the front edge.

Use a flathead screwdriver to gently pry the bottom of the cabinet up. Notice that there are staples in certain areas, so you need to gently work them out as you lift the cabinet bottom 3 inches or so.

Pull the USB port down (gently), and notice that WHITE is NEGATIVE polarity in Winnebago's wiring here. Disconnect the wiring simply by pulling.

Put the new USB port in the original faceplate, attach the new USB port to the existing wiring (Yellow is +, White is -), and put the port back in the hole in the bottom of the cabinet.  Use the new USB port's lock ring (red arrow in the above picture) to tighten it against the cabinet.

You now have new, higher powered USB ports that indicate current voltage, and the LED provides a small night light. If you don't want the night light, then you can cover it with a small amount of nail polish. Thanks to Jim Lincoln in the Revel Facebook group for the part number and inspiration!


USB Ports

We wanted some more USB ports in the cockpit for charging our phones while going down the road, so we decided to install two more high-speed (higher voltage) USB ports near the floor console for convenience.

Mood Lighting

This is how we roll - - we like to hang out inside during a cold winter night in the desert, and we LOVE mood lighting. Off the grid - - warmth, music, low lights, good vibes! 

We bought these USB LEDs from Amazon, and really like them -- they're cheap, small, and put out a lot of color. These particular ones have a color selection switch on the side to match your mood, or they cycle through all the colors, reminding you of your last bender. We put them at all the USB ports in the van.


A moment of red in the front, blue in the back, apparently. (We also like the gold accent colors provided by LED candles, shown here.)


We find that the van is very dark at night, so we needed a night light. We bought another USB LED stick that is dimmable and puts out white light. (There is a surprising lack of USB-powered nightlights, by the way.) We use this one over the cooktop on its lowest setting, and it's just right. Sips power all night, provides lighting for the bathroom in the middle of the night, and remains cool to the touch in the morning.


One principle of usability is software is that you won't use a feature if it's not convenient, and the same is true with these lights. If we're always storing them in a packet in a drawer or cabinet, then it becomes an impediment to using them. I set out to solve that.


I gathered these materials...


And did this with the strip of elastic. I hated to put holes in the van, but they're very hard to see, and can easily be refilled with spackle at some later date. 


Problem solved - - they're always exactly where you need them, easily accessible for plugging and unplugging, and totally safe from being harmed. (This is the USB port over the cooktop, where we use both the color stick and the nightlight, so they're both mounted here, depending on the application.)