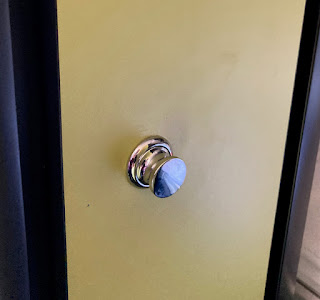
Ralph Hill from the Revel Facebook group has upgraded his cabinet latches, and he detailed the technique here:
The Problem
The existing “Push Knob” latches in my early 2018 Revel do not work well:
- Sometimes the knob will not pop out.
- Often the drawers are a struggle to open even with the knob out.
- The mechanism has fallen off the inside of one of mine due to stripped screws.
- Also they take up a lot of room on the inside.
The Solution
Several friends and acquaintances strongly recommended “slam latches”. These are well known in the boating industry. They come in several sizes and from many manufacturers. I chose a small slam latch from Southco made entirely from stainless steel. They are expensive, but sometimes outlast the boats they are installed in, in a salt water environment. I used the Southco model M1-15-61-8. The Southco slam latches work much better than the original latches. I am very glad I made the change.
Special Tools Required
- 1.5" Hole saw to make the template
- Template following router bit and router
- Right angle drill for drilling new holes for the keepers where needed (not enough room for a conventional drill)
Installation Challenges
Removing old trim rings
Getting the old trim rings out was difficult. They have to be pushed out from the back a little to make room to pry them out from the front. I found that cutting two slots in the bodies of the trim rings helped, but I still had some of the face material for the fronts crack off when I pull the trim ring out. Fortunately this was always within the area cut away to enlarge the hole.
Enlarging the Holes
The hole size for the slam latches I selected is 1.5”, the existing holes are 1”. The distance from the center of the hole to the tip of catch is different (by 1 to 2 mm). Fortunately this means the old hole is fully contained within the new hole. To enlarge the holes, I made a template out of 1/4” plywood with a 1.5” hole. I placed this on the front and carefully aligned side to side and 1 to 2 mm closer to the latch side. For the first one I measured this very carefully. For the rest I just did it by eye. Much faster and just as accurate by eye. I clamped the template down and cut the hole with a router using a template-following bit.
I chose not to use a hole saw for several reasons:
- The pilot bit would have to be in the existent hole, so starting cleanly would be impossible without a drill press. I do not have a drill press.
- Aligning the hole saw would require first aligning a template and then centering the hole saw in the template. If you have the template aligned and clamped, then the router is fast and clean.
- I was worried about getting a clean cut on the back.
Keepers
The existing keepers will not work with the slam latches. The new keepers project more into the cabinet. Maybe an issue? The new keepers have to moved back relative to the old keepers. I had to drill new holes for the screws to hold the keepers in all three drawers and the pantry. In the overhead cabinets I was able to reuse the existing screws and holes.
BEFORE
FINAL RESULT


Apr-14-2021


