Showing posts with label door. Show all posts

Door Organizer

This product from Canyon Adventure Vans ("The Doorganizer") works well on the rear doors for small items. It was an easy 15-minute installation, and is handy for items that I frequently need from the rear of the van.


7-June-2022

Hinge Eye Bolts

It can be useful to hang clotheslines, tarps, and other items from the back of the van when camping, so I've added eye bolts to the rear hinges to serve as attachment points. 

This required the following items:


Thanks to Jim Lincoln, Ralph Hill, and Marcus Hammitt for sharing knowledge & parts list!


23-Oct-2021


Lazy Lounger Hook

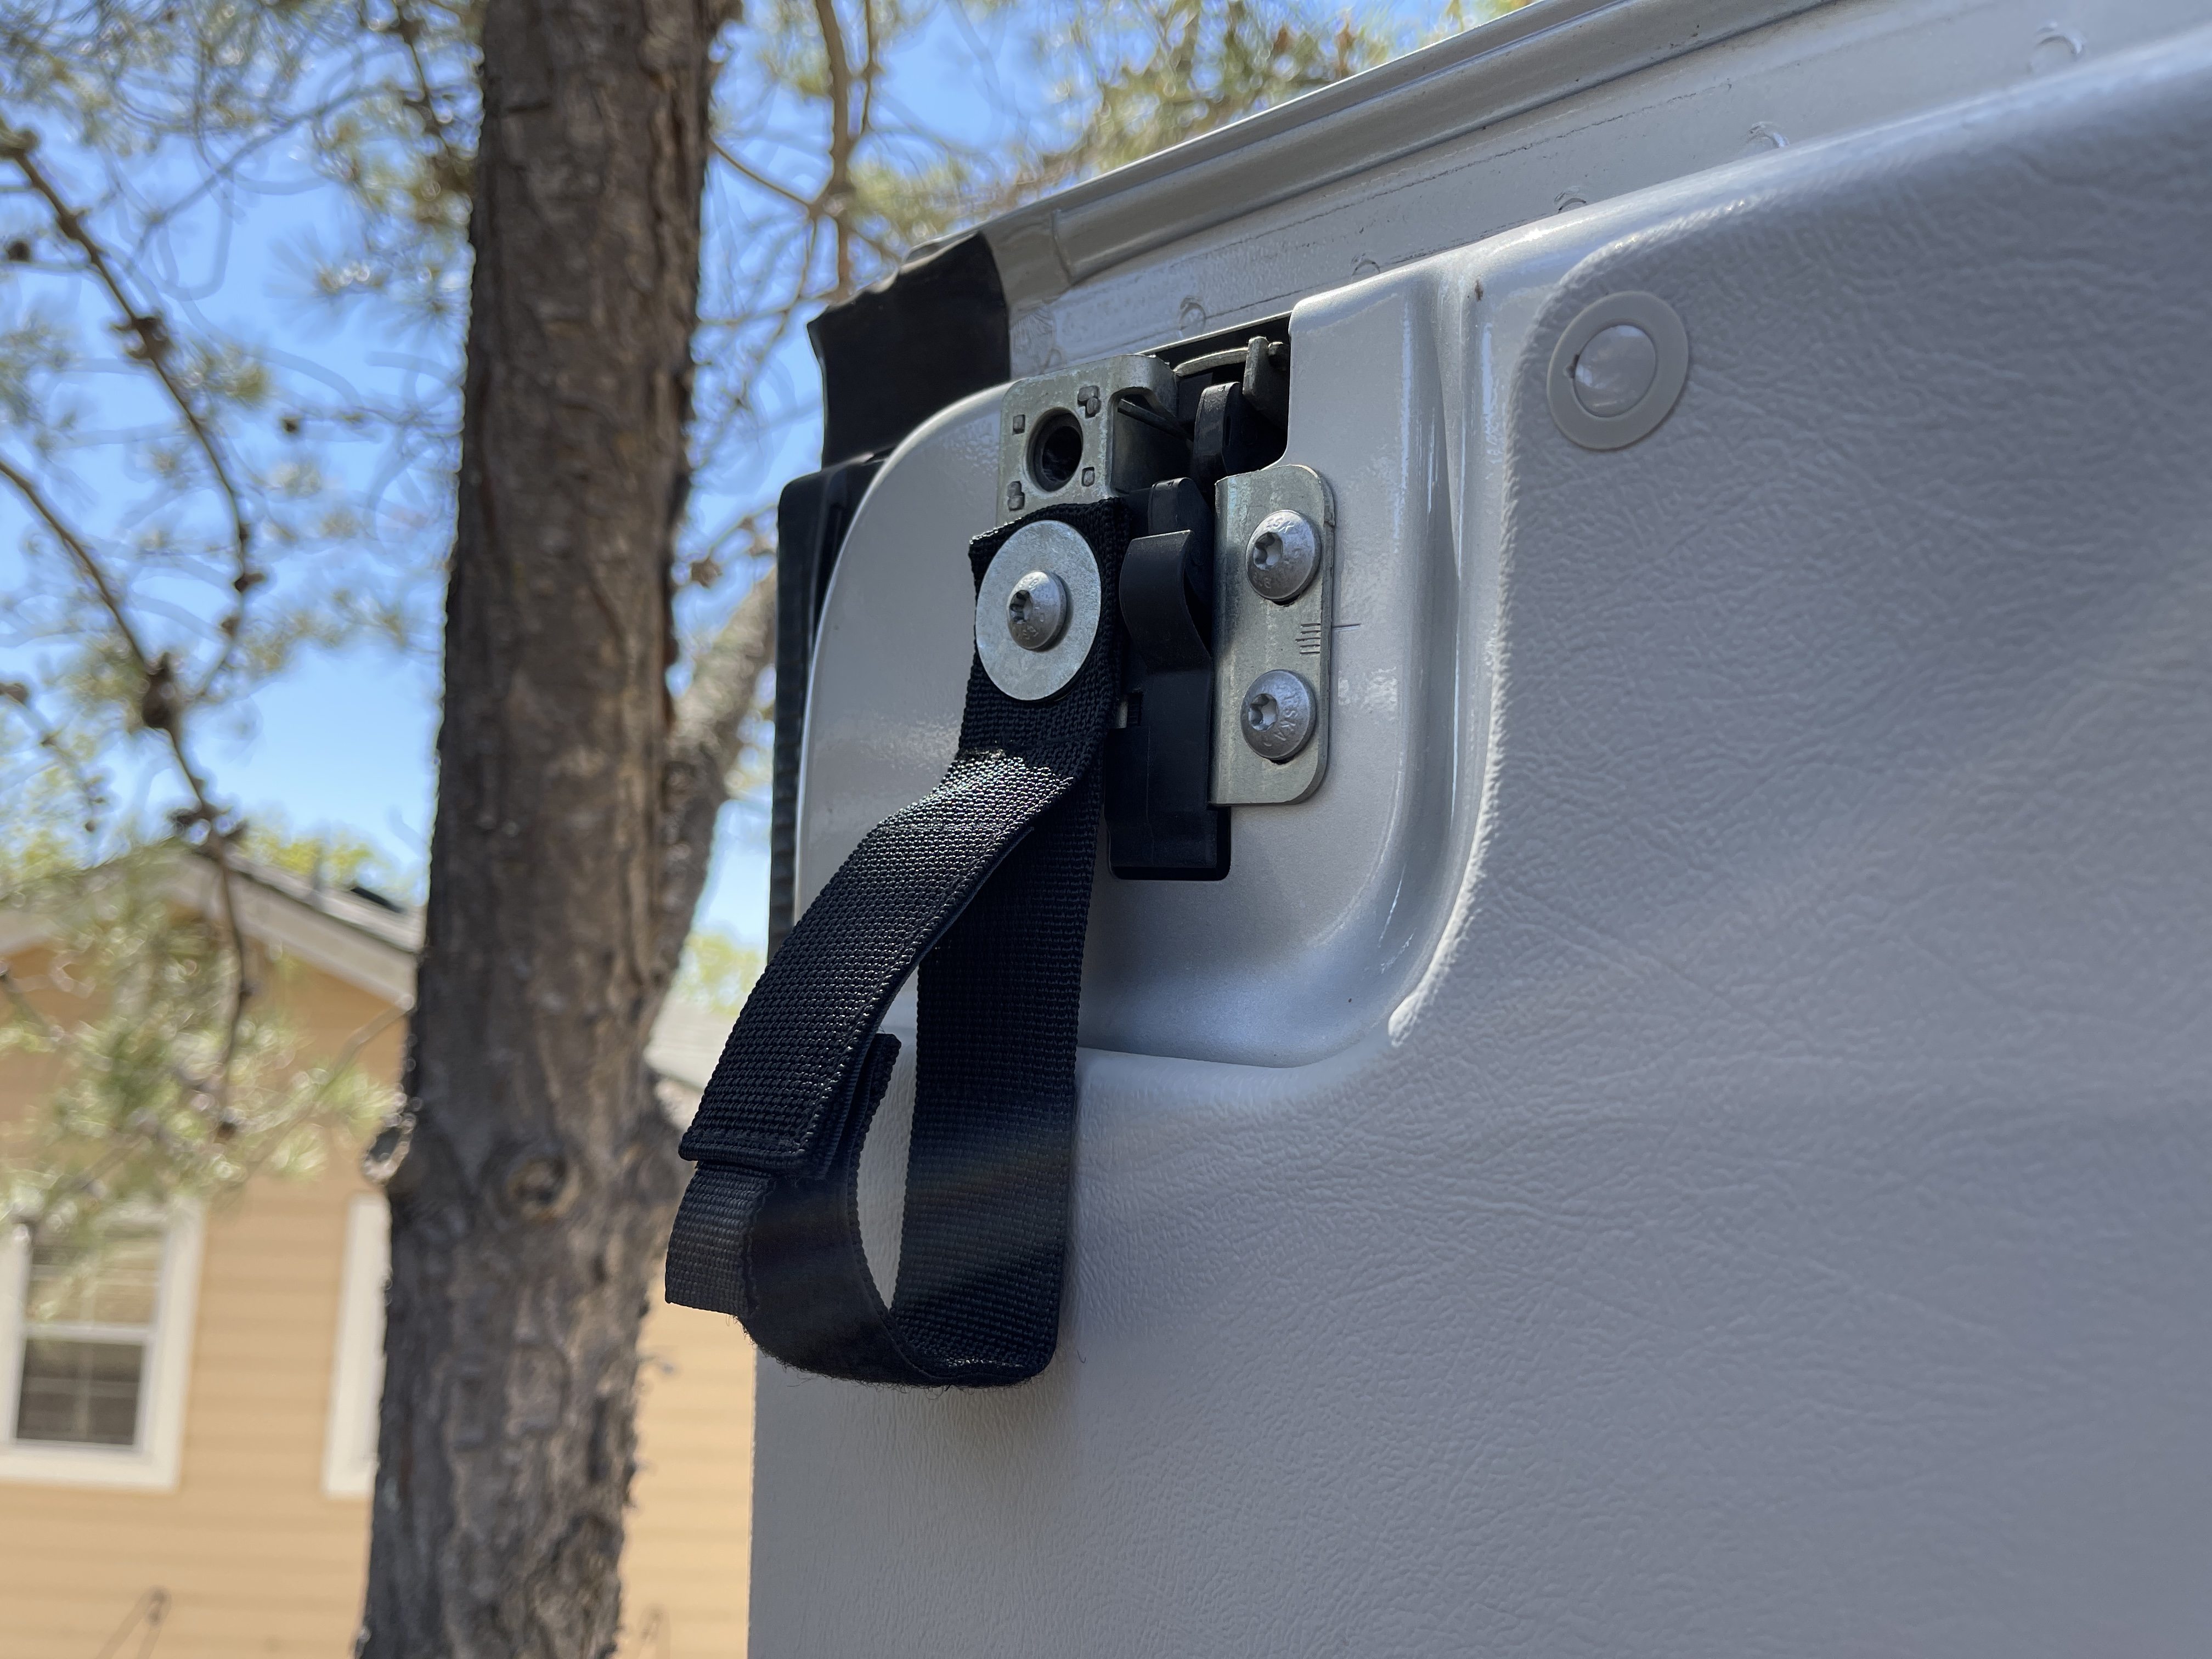
We like to hang out in bed with the back doors open, stargazing, listening to music, napping. However, we often fall asleep back there, and then it's late at night, cold outside, and I hate having to get out of bed and go outside to close the doors.  Cue the Lazy Lounger Hook...


I got some of these nylon 'extension cord organizers' ($7) and attached them to the doors using an existing Torx bolt in the latch mechanism. I secured it using a fender washer. This is the loop for grabbing the door to close it with a hook.


The hook needed to be collapsible for storage in the van, but long enough to extend out to the far corner of the door. For the the extending handle, I got this telescopic extension pole ($13.50). For the hook, I got this utility hook ($13) for putting up Christmas lights.


For mounting the Lazy Lounger Hook, I used these Grip Clips ($4) and fastened them to the side of the bed.


Ahh, no more freezing 2:00 am departures from bed to close the back doors...


16-April-2021

Stabilizing the Window on the Sliding Door

Many Revel owners have noticed that there is excessive rattling and instability in the large window in the sliding door.  This is primarily because the stabilization ribs for the door have been removed by Winnebago to make room for the window, leaving the window attached ONLY to the thin metal skin on the door. The red lines, below, show where the support ribs were.


In order to improve this, I followed examples from Facebook Revel members Ralph Hill and Jason Vigil to create structural ribs that connect the window to the structural supports in the door.  This is an illustrated guide for doing that.

  • Time: 3 hours
  • Cost: $25
  • Tools: Philips screwdriver, hacksaw, drill
  • Materials: Angle aluminum (see below), silicone glue, 10 wood screws


Remove the plastic end caps from the window blind frame and remove screws behind them.

You may need to use an offset screwdriver to access the lower right corner.

Remove the screws from the four inner corners of the window blind.

Remove the 4 screws holding the grey plastic panel to the door frame.


I bought 2 pieces of angle aluminum shown below.

I measured approximate lengths of 26.5" and 25.5" for the front and rear ribs, and cut the aluminum to fit. After repeated placements and adjustments, I was able to cut each of the grooves shown here with a simple hacksaw.

The angular cut shown below is to accommodate the grey plastic panel when it is reinstalled.


Repeatedly making small cuts and testing the fitment resulted in a tight, solid fit.


I used a black marker to determine where the screws would attach to the window, and drilled them out with a hand drill. I used 5 screws per window.


Yielding this as the final product. Time for installation.

Following others' suggestions, I applied a bead of silicone glue between the window frame and the aluminum support.


After mating the aluminum support to the window frame, I put 5 screws in each support, giving the final result here.


Note that the tolerances are fairly small. There was some concern about mating steel and aluminum, resulting in Galvanic corrosion. However, my neighbor happens to be a metallurgist, and he told me, "If you're dealing with mild steel (not stainless steel), then it's no problem. Aluminum and mild steel are very close on the Galvanic scale."


Jul-1-2020

Fixing the Window Rattle in the Sliding Door

Ralph Hill, a member of the Revel Facebook group, has developed a fix for the rattling window in the sliding door. He wrote up all the details, and I'm posting it here with his kind permission.


For me, the noise in the sliding door is mostly rattling. I found three issues:
  1. The body panel the window is mounted in is not stiff enough—the window tends to flop in and out.
  2. The grey interior trim piece slaps agains the metal of the door at the edges. Mostly at the front, bottom and back. The top is not much of a problem, probably because the structure for the door is closer to the window at the top.
  3. The grey interior trim piece slaps against the frame for the window interior screen, mostly at the top.
The window is mounted to the skin of the door, not the frame. There are two stiffeners supporting this part of the skin that must be removed to install the window. After the window is installed the mass to be supported is increased because the window is heavier than the piece of skin that is cut out. At the same time, stiffeners are removed making the panel less stiff. This is made worse by the grey interior trim. It is attached only to the window and not to the door directly. Thus, even more mass is supported by the skin.

To stiffen the mounting of the window, I made four brackets, one for each corner of the window. These brackets connect the window to the the structure of the door. They are made from some scraps of softwood that I had. Each piece is approximately 1” x 3/4” x 7 1/2”. (This size is not necessarily the best—it is what I had lying around). I cut a thin groove in the end of the brackets with a hack saw. The structural metal of the door fits into the groove. The brackets are shaped to clear the grey plastic trim and are attached to the wooden frame around the window with screws and silicone adhesive. The brackets do not touch the skin.


There are flat metal corner brackets that attach to the wooden frame around the window. These did not have every screw hole populated. I added a screw in every hole I felt I could safely add a screw. I pre-drilled the wood because it is brittle and I did not want to risk cracking it. I hope that by adding more screws I made things l little stiffer and stronger.


To stop the gray plastic trim from slapping the metal I decided that it had to be screwed to the frame of the door. I could not find a way to do this across the top, but I could on the three other edges. I glued small pieces of 1/4” plywood to the metal frame with epoxy gel. Then I transferred the locations of the wood to the gray plastic trim using reference marks on tape attached to the door. I pre-drilled the grey plastic trim. Then I mounted the grey plastic trim and used #6 x 3/8” pan head screws to screw through the grey plastic trim and into the plywood pieces. I predrilled the plywood to reduce the risk of splitting it.

Screwing the grey plastic trim in this way does two things:
  1. It makes it impossible for the trim to slap against the metal.
  2. It attaches the trim to the frame of the door helping it stiffen the window. Thus, the trim is part of the solution instead of being part of the problem.


Across the top, where I could not screw the grey plastic trim to anything, I placed a strip of 3/16” thick grey foam weather stripping against the structural metal. The grey plastic trim might be able to slap against this foam, but that will not make much noise. (This weather stripping can be seen in both the second and third photo).

I added 3/8” grey foam weather stripping to the back of the grey plastic trim across the top and bottom of the window opening, and 3/16” thick grey foam weather stripping on the sides. This is to try to press the trim out against the frame for the window covering. This was not quite enough, on the top I had to add a small piece of 3/16” on top of the 3/8” in the middle. Finally, I put a small piece of anti-rattle felt on the grey plastic trim piece where it touches the top middle of the frame for the window covering. 

Overall, the structure is much stiffer. When you slam the door closed the window does not flop around. It hardly moves. I have to do a serious test on some crappy gravel roads. Once that test is passed, I will add some insulation (probably Thinsulate) between the grey plastic trim and the door skin.


Window Rattle!

The window on the sliding door of the first 2018 Revels is notorious for irritating rattles. Winnebago apparently has a fix for this, and is shipping new vehicles with that fix, but since mine is one of the earliest ones, I needed to take matters into my own hands.

The primary, most irritating rattle is due to this silver flexible magnet. It is a little loose in the privacy screen (top and bottom), and chatters as you roll down the road. I used my fingers to pull the magnet out of the channel - - it remained anchored on each end, and I didn't mess with that.


Without doing much research, I used this stuff, and cut a small hole on the application tip so I could get a small stream of glue coming out. 


I just filled the channel up with the glue, and didn't worry too much about overflow - - it cleaned up very easily. I can confirm that it killed the rattle DEAD.


Bathroom Door Latch

This damned thing will surely be revised soon. The grapevine says that this was a last minute addition to the Revel in late September 2017 after some early beta testing. It does a good thing, which is to keep the bathroom door from vibrating, but it is easily loosened, and requires frequent tightening and adjustment — in our experience, about every 3 days. I’m not a mechanical engineer, but it seems over-engineered to me, and could/should be done more simply, with fewer moving parts.

The key is to not over-tighten it by turning the black knob past its maximum point. (You have to operate it by feel.) To fix it, you need to keep adjusting the nut nearest the door.


Sliding Door Stop

This is a killer mod that solves a problem that all Revel owners are going to have at some point. Namely, the sliding door doesn’t have any intermediate ‘stop points’ — it’s either closed, or all the way open. This isn’t good when it’s cold or raining, because you lose a lot of heat, or get excessive rain into the van. This device introduces a ‘stop point’ for the door at the location that you choose. 

You can find it here.


It costs about $40, takes about 15 minutes to install, and comes with accurate, beautifully-written instructions that even an English teacher would appreciate. Essentially, you locate the position where you want the door to stop, and epoxy the device in that location. The manufacturers will throw in the correct epoxy (JB Weld) for an extra $5. (The epoxy process takes 24 hours to cure.)


Here is the door in action, stopped in the location that I wanted. Of course you can keep rolling past that point and still have the door be completely open if you want it to be.

We made our intermediate stop point aligned with the end of the galley cabinets, as shown here.