Showing posts with label roof rack. Show all posts

Replacing the Awning

We've wanted to replace our original Winnebago-installed Carefree awning for years. We didn't like it sitting up on top of the rack where it took up usable space, it was the wrong color, and it didn't have any legs for staking down the awning when winds come up. 


After we replaced the roof rack with a Front Runner Slimline II deck from Canyon Adventure Vans, we finally had a viable platform for attaching a new awning. After doing a lot of research, we settled on a wall-mounted (as opposed to a roof-mounted) awning from Fiamma: the F45S 300 (300 centimeters, about 10'1"). In spite of pandemic scarcity, Panther RV Products in Washougal, Washington had about 10 in stock that shipped the next day, as opposed to drop-shipping from Fiamma after waiting 8 weeks. As it turns out, I ordered on a Monday, and had it in my hands on Friday. Panther creates a wood-reinforced crate that surrounds Fiamma's cardboard box, and it's a wise move - - Fedex brought ours with a seriously damaged crate, but it protected the awning inside very well.


Removal of the awning was very fast & simple from the Front Runner rack. Disconnect the power (and remove the fuse), detach the awning from the bracket, and detach the bracket from the roof. This took about 20 minutes.


The most difficult part of this project was determining exactly how the new awning would attach to the rack. I wanted a simple & elegant solution that would not put holes in the van or in the rack. As it turns out, Front Runner makes a zillion kinds of accessories for their racks, but they don't make one for Fiamma wall-mounts.

I installed the awning using two different methods, and the second method seems to be the best one. So I'm explaining what I did here, but also including the first method, which I abandoned, so that readers can learn from my experiments.

Second Method (The Better One)

I became concerned about the effects of gravity and rotational torque on the side rails of the rack, so I looked for a way to decrease the torque and attach the awning more securely. Rather than having the awning attached to the rack using extensions, as they were in my first method (see below), I decided to attach Fiamma's aluminum brackets directly to the rack, as shown in these pictures.


This method would minimize the rotation torque on the rack, but after conferring with Front Runner's technical support, I looked for a way to tie that torque into the T-slots in the slats of the deck itself. I spent some time in a hardware store, looking for materials that I could adapt for this use, and came upon these corner braces.


I have a friend who is a master at metalworking and welding, and he spent about 90 minutes working five of these braces into perfect anti-torque brackets. They are shown here with paint & clear coat, but I may get them powder coated at some point.


I painstakingly drilled six holes into the rack at uniform height & distance, then attached the Fiamma aluminum brackets to the rack.


Then I added the anti-torque brackets at crucial points on the rack, and can report that the awning & rack seem very solid, without flex or roll.


I prefer the look and function of the awning in this new location - - it's lower and tighter against the van, tucked into the gap between the rack and the van, and it's a bit lower for reaching from the ground.


First Method (Abandoned)

After extensive searching, I found these Fiamma F45S-specific brackets from Unaka Gear Co. They're made to match the Fiamma mounting plate, and are fabricated from 1/4" welded steel.


I simply bolted the pieces together, made my measurements, and then bolted the assemblies to the mounting channel on the top of the rack using stainless M8 20 bolts (recommended by Front Runner).


It's important for the Fiamma to have all three mount points aligned as well as possible, so I used string as my guide. I aligned the two end brackets, then brought the center bracket into alignment with the string.


I got a friend to help me lift the awkward 50 pounds into place, using two stepladders, and it dropped into the mounting channel instantly and without issue. Very, very easy. I tightened everything down, and added the small alignment screws to the underside as Fiamma explains in their instruction manual. Total installation time was about 4 hours, but it could be done much faster - - I did almost all of it by myself, and fussed over each detail, which slowed me down quite a bit.


________________________________________________
Time to step back, survey the work, and check functionality.


There's quite a bit more space on the right side of the deck now. We may add a long, narrow solar panel to the rear passenger area of the deck, and then remove the big one over the driver's area, thus freeing up that spot for a chair or blanket.

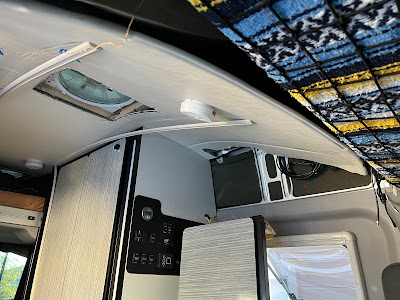
We're storing the crank arm in the small vertical space next to the bathroom door.


30-January-2022

Removing the Ceiling Headliner

I've been chasing a roof leak, and needed to pull the ceiling headliner down in the front of the van. Here's how I did it.

There are essentially 3 pieces keeping the headliner up in the front of the van, as shown below - - the dinette cabinet, a 'pinch' retainer bracket, and some trim over the sliding door. For the first item, see my blog post about how to remove the dinette cabinet.


Removing the two trim pieces over the sliding door is very easy, just a few self-drilling screws to remove.


The pinch bracket holds up the entire front of the headliner, and it vexed me. Based on the way it is built, it seems that Winnebago installs this bracket first, then slides the entire headliner forward into this pinch point when the van is empty. I couldn't remove everything in the van, so I resorted to brute force. 

There are three pieces to mess with. The arch trim is attached to a long piece of wood with two wood screws, and the wood is attached to the pinch bracket via an unknown method (glue?). I used a large screwdriver to pry the arch trim from the wooden piece just a little bit so that it introduced some play ('wriggle room') into the assembly. This wriggle room was enough to pull the headliner out of the pinch bracket, thus dropping the entire headliner in the front of the van. Note that the headliner is not glued or in any way attached to the pinch bracket, it just sits in the pinch slot, and the bracket keeps it from flopping down.


After removing some screws in the headliner's track lighting, the entire headliner bends down and you can access the roof. In my case, I did this so that I could find the source of a roof leak on the front passenger side.


After pulling down the copious foam insulation that's attached to the roof, the bare metal is exposed, and you can see what you're dealing with. For me, it was useful to examine the roof rail screws and the rivnuts that Winnebago installed for mounting the awning in its factory location. (My awning has been moved from the factory location and I needed to make sure that these points weren't leaking).


To put it back together, I just did everything in reverse order, although I found that it took two people to get the headliner seated properly in the pinch bracket. No visual damage was done, it all looks original and untouched.


20-December-2021

Roof Rack Replacement

We finally replaced our original Summit rack with a Front Runner Slimline II rack. It's a pretty big job, so the fine folks at Canyon Adventure Vans sold us the rack and installed it for us. We've got a lot more space to serve as an observation deck, for storing gear, and for providing full shade on the van's roof during sunny days. So much more stable than the old one! We intend to find a smaller high wattage solar panel to replace the current 100 watt panel that we left up there. (We have a high capacity lithium system, so it's less critical for us.)


Rack attaches to OEM rack rails.


The slots require 5/16" stainless steel bolts (3/4" - 1" long) for attaching items to the slats.


12-November-2021