After using the heating system in our 2018 Revel for 2.5 years, there were a few improvements that we wanted to make. Since the system was designed by Rixen's Enterprises in Sandy, Oregon, we decided to have them do the work, and we drove the van to Rixen's in July, 2020.
Our goals were the following:
- Replace the stock Winnebago thermostat with a modern, more accurate version;
- Relocate the Espar heater to the back of the battery box on the driver's side;
- Service the Espar heater;
- Replace the somewhat noisy glycol pump with a newer, quieter version;
- Add an engine heat exchanger so that we could drive through sub-freezing temperatures without having to use the Espar heater to keep the tanks warm.
All of this was accomplished in about 4 hours, and cost about $950.
A diagram of the heating system, compliments of Bob Fulton from the Revel group on Facebook, shows all the major components, along with the changes that we made on this trip.
The original thermostat was cheap, simple, and highly inaccurate. Rixen's have made a newer version for their system, and while it's a bit more finicky, it's also more accurate, with a 'swing' (hysteresis?) of about +/- 2 degrees. We're generally happy with it, though it takes some light touches with its touch-sensitive interface. Also, since it's more sensitive, it cycles the furnace much more often than the old thermostat. 
It was necessary to relocate the Espar furnace because Winnebago installed them high on the frame during 2018-2019, in an extremely inaccessible location. Thus, if the Espar needed maintenance or troubleshooting, it was very difficult to access. The standard location in newer Revels is to mount it on the back of the driver's side front battery cage, which is what Rixen's did for us, shown here. They also serviced the Espar, replacing the used atomizer screen for the igniter, flushed and replaced the glycol, and found that our altimeter had never been properly wired by Winnebago back in October 2017, when our van was built. We also picked up spare gaskets and atomizer screens in case we need to service the unit in the future. Here is a photo of the Espar in its new location.
Due to its new location, we rerouted the exhaust line, bringing it up higher, and putting it behind the galley window.
The original glycol pump was somewhat whiny, and I want the quietest van I can get. Rixen's newer pump is almost dead silent, and apparently has 2x the power of the previous version, so we had Rixen's install it. In the following photo, it is the blue appliance under the glycol tank.
Finally, we added a heat exchanger from the engine to the heating system so that we can use the engine's heat instead of running the Espar. This is advantageous when driving through sub-freezing temperatures because it will keep the van's tanks from freezing WITHOUT having to run the Espar furnace. A heat exchanger is installed under the van, just below the glycol tank, and two lines (in & out) are run from the engine's coolant system back to the new exchanger.
A view of the heat exchanger, with brass fittings, mounted up high along the frame with two lines of coolant running to it from the engine.
Here are a few photos showing the changes that are made to the cooling system under the hood.
The trick for keeping the tanks warm while driving is that the circulation pump must be running, so that is accomplished by turning on the system, setting the thermostat to some high temperature, and turning the fans off. The fans are turned off with the center setting of the fan speed switch. (Note: Bob Fulton improved this kludgey configuration by installing a proper switch - - see the Facebook group for details.)
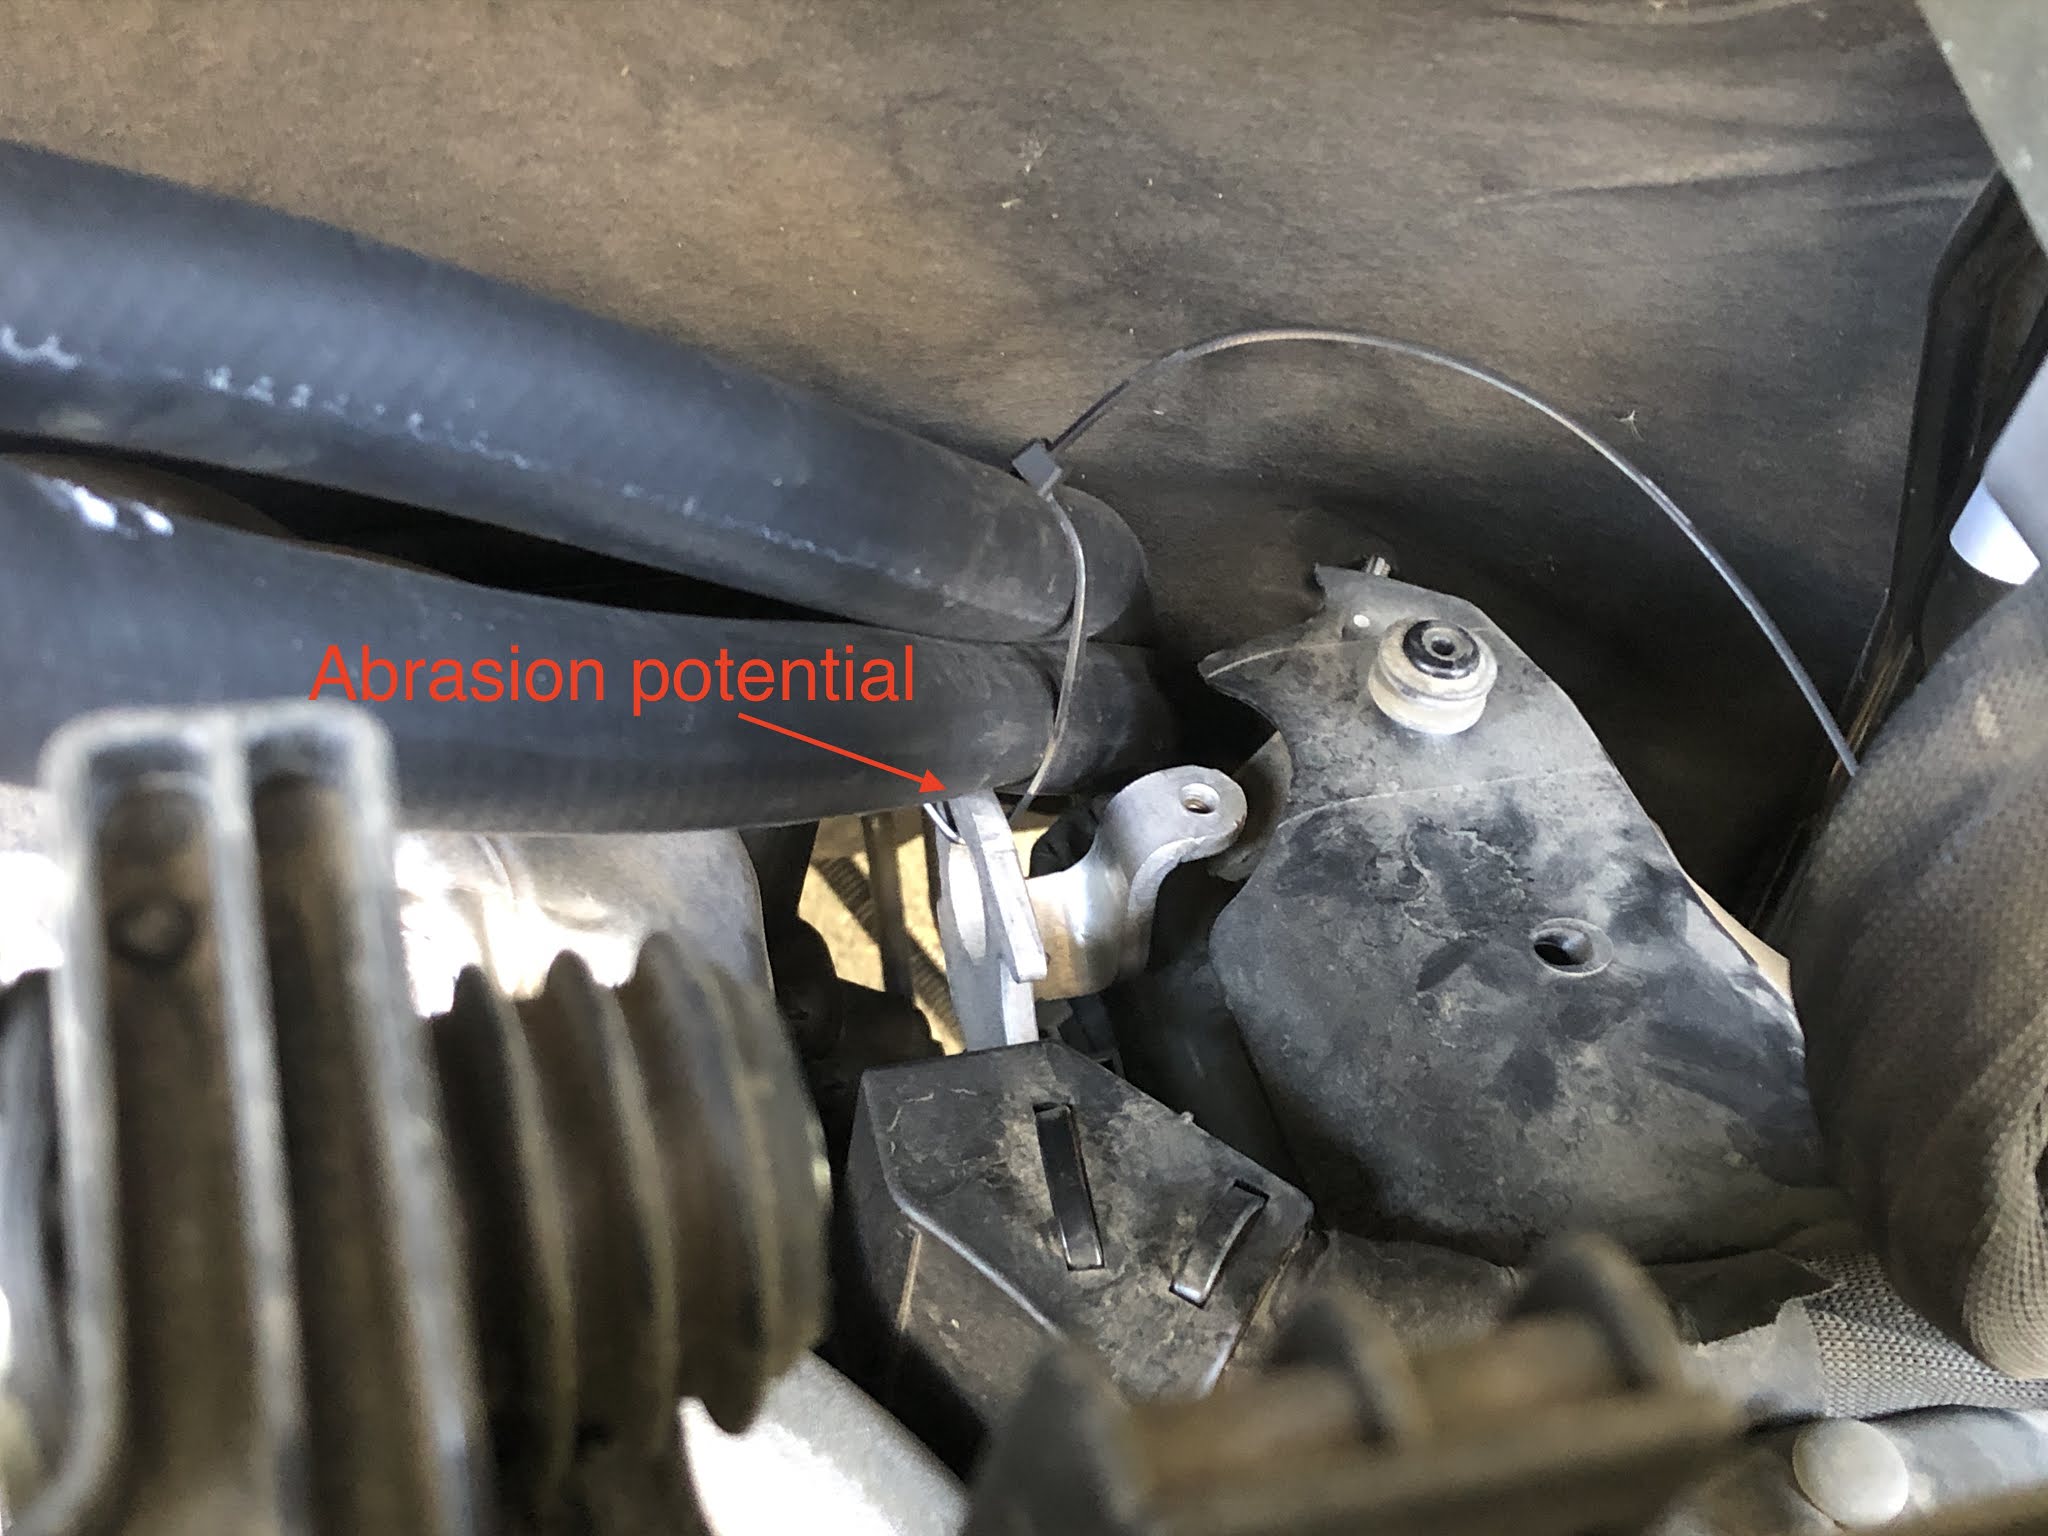
One point of failure for the heat exchanger is a rupture in the coolant lines that run back to the exchanger, specifically where they are mounted near the engine, where they are susceptible to abrasion. One Revel owner has already found a leak from this, so care must be given to how the lines are mounted. Here is how mine were originally installed - - note the potential for abrasion from the engine lift hook.
I wrapped my lines in an extra layer of hose, and ziptied them to the engine lift hook, shown below. In this way, the extra layer absorbs the abrasion, but this remains a contact point that has to be monitored.
A better way of doing this is Bob Fulton's approach, in which he manufactured an arm to hold the lines free of the vibration. Bob says that to manufacture this arm, "It was an 1" over (part with hole drilled), then 2" up, then 4" over again."
Bob Fulton also made an excellent diagram of the heating system, along with a cheat sheet on how to use it.
Finally, meet Jim Rixen.
14-July-2020