Early Revels shipped without a fairing or air dam, so the leading solar panel caught a lot of wind and made a lot of noise. Several people in the Revel Facebook group ('Winnebago Revel 4x4') inverted the crossbeam and lowered the panel on the leading edge to improve the aerodynamics, and I finally got around to doing that. Here's what I did...
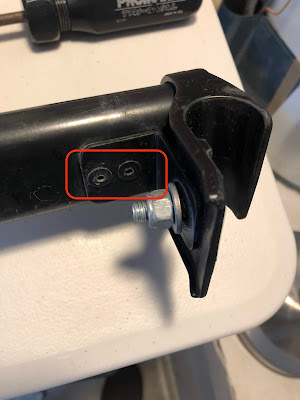
After detaching the solar panel and removing the crossbeam, I had to remove the rivets that were introduced by Winnebago in one of their early Revel recalls.
After removing the rivets and freeing the L-brace, I was able to invert the bar. However, to maintain the function of the L-brace, I had to drill a larger hole to replace the rivets with a 5/16" carriage bolt. I chose a 3/8" bit, matching the other 3/8" inch hole on the L-brace.
When this was complete, I was able to reassemble the crossbar fitting with carriage bolts and stop nuts (should have used stainless, but couldn't find it).
When the cross bar is back on the van with the lowered solar panel, it's much more streamlined than before.
After detaching the solar panel and removing the crossbeam, I had to remove the rivets that were introduced by Winnebago in one of their early Revel recalls.
When this was complete, I was able to reassemble the crossbar fitting with carriage bolts and stop nuts (should have used stainless, but couldn't find it).
When the cross bar is back on the van with the lowered solar panel, it's much more streamlined than before.


