Showing posts with label cabinet. Show all posts

Removing the Dinette Cabinet

I needed to remove the dinette cabinet so that I could get behind the ceiling headliner. I found that it's easy to remove it, but harder to put it back up. Here's how to do it on a 2018 Revel.

After removing the inside of the cabinet ('floor' of the cabinet is a separate piece, and the back & 'ceiling' of the cabinet are a single folded piece) with regular screws, you're faced with 8 screw locations that are holding the cabinet to the ceiling and wall.  An overview photo is the following:


The 2 screws that attach to the shower wall are here.


The three screws that attach to a metal bracket above the headliner ceiling are here.


Three screws attach to the driver's side wall here.


Here's where the wall screws attach through the cabinet (one of three screws shown).


Reattaching the cabinet is a good job for two people - - it's a bit tricky to lift the cabinet, get the holes lined up, and tighten it all by yourself. Make sure that you're on good terms with your helper, because you'll be swearing a fair bit. 


20-December-2021

Replacing the Push Knob Latches with Slam Latches


Ralph Hill from the Revel Facebook group has upgraded his cabinet latches, and he detailed the technique here:


The Problem

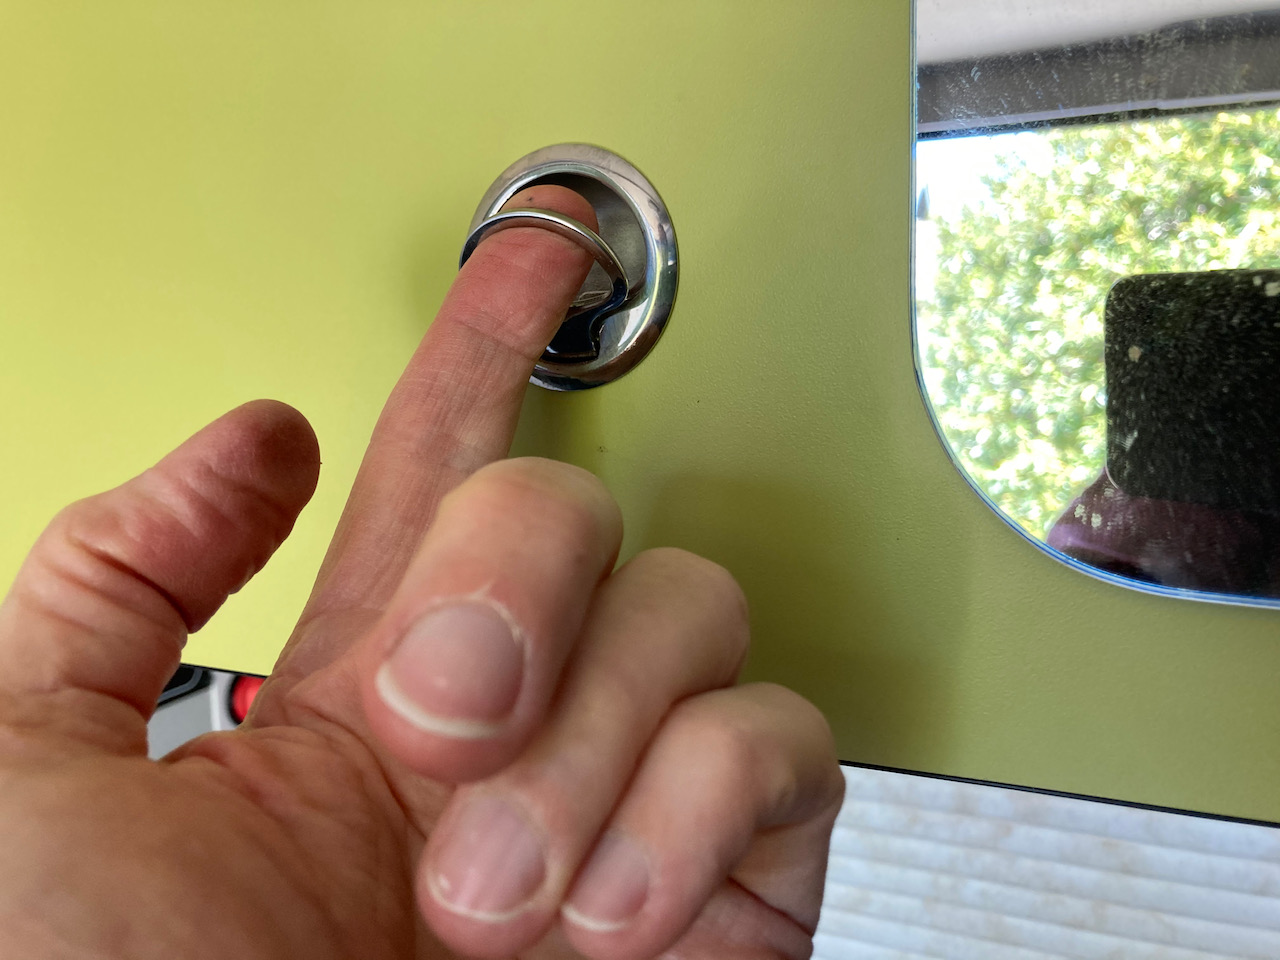
The existing “Push Knob” latches in my early 2018 Revel do not work well:

  • Sometimes the knob will not pop out.
  • Often the drawers are a struggle to open even with the knob out.
  • The mechanism has fallen off the inside of one of mine due to stripped screws.
  • Also they take up a lot of room on the inside.


The Solution

Several friends and acquaintances strongly recommended “slam latches”. These are well known in the boating industry. They come in several sizes and from many manufacturers. I chose a small slam latch from Southco made entirely from stainless steel. They are expensive, but sometimes outlast the boats they are installed in, in a salt water environment. I used the Southco model M1-15-61-8. The Southco slam latches work much better than the original latches. I am very glad I made the change.


Special Tools Required

  • 1.5" Hole saw to make the template
  • Template following router bit and router
  • Right angle drill for drilling new holes for the keepers where needed (not enough room for a conventional drill)


Installation Challenges

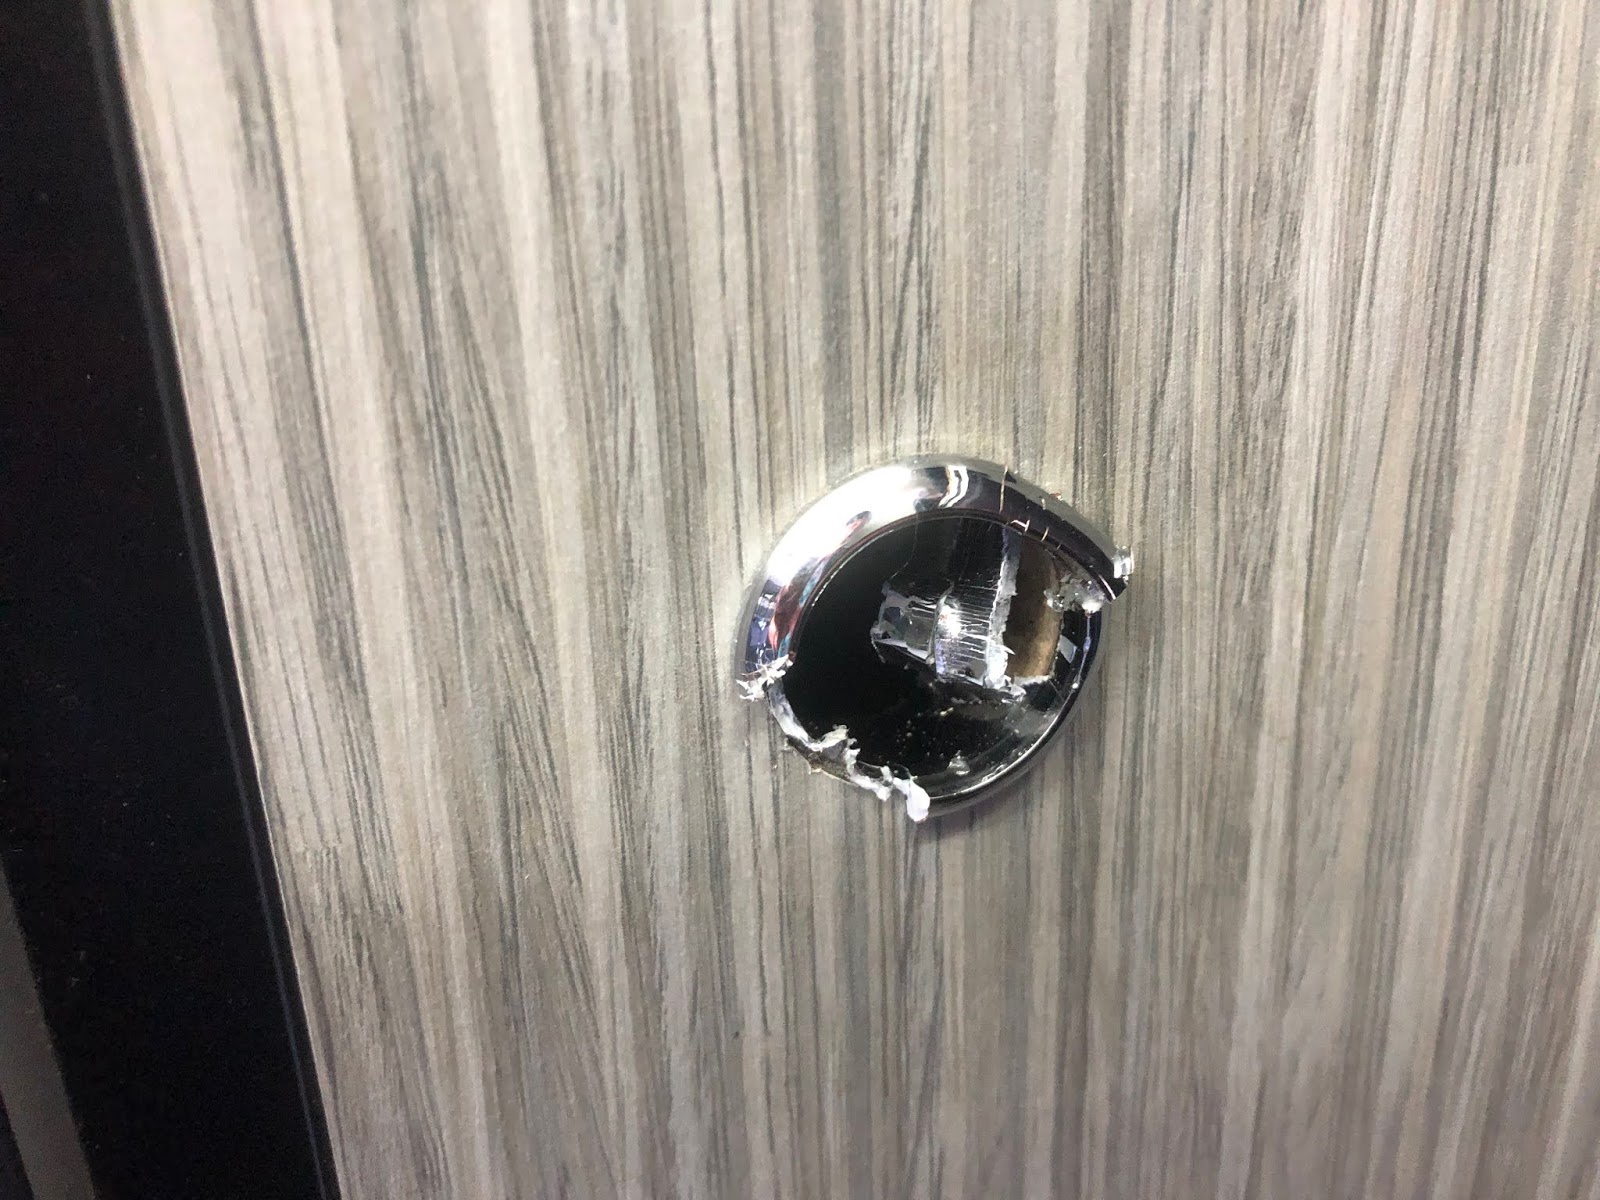
Removing old trim rings

Getting the old trim rings out was difficult. They have to be pushed out from the back a little to make room to pry them out from the front. I found that cutting two slots in the bodies of the trim rings helped, but I still had some of the face material for the fronts crack off when I pull the trim ring out. Fortunately this was always within the area cut away to enlarge the hole.
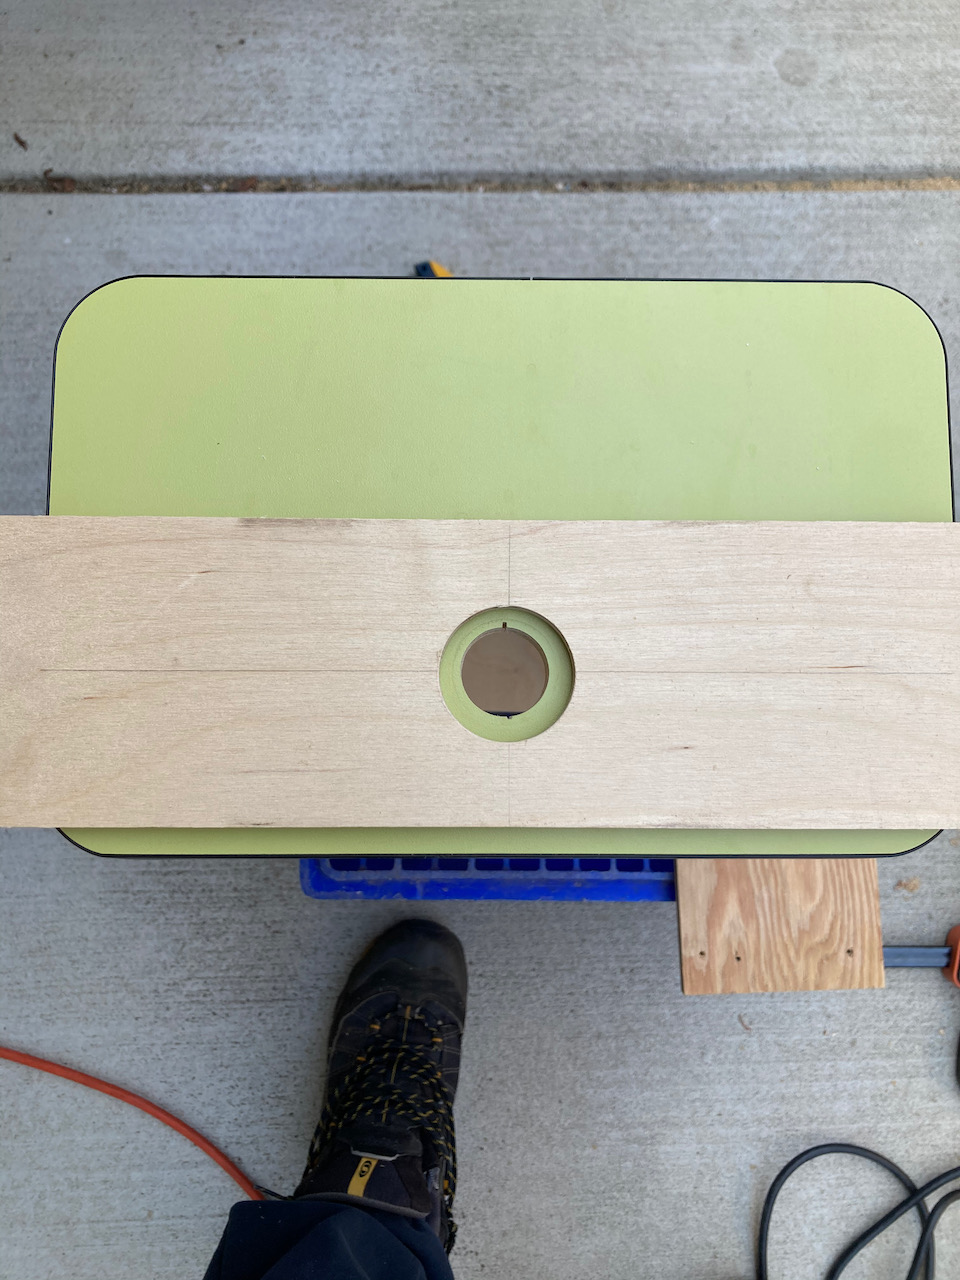


Enlarging the Holes

The hole size for the slam latches I selected is 1.5”, the existing holes are 1”. The distance from the center of the hole to the tip of catch is different (by 1 to 2 mm). Fortunately this means the old hole is fully contained within the new hole. To enlarge the holes, I made a template out of 1/4” plywood with a 1.5” hole. I placed this on the front and carefully aligned side to side and 1 to 2 mm closer to the latch side. For the first one I measured this very carefully. For the rest I just did it by eye. Much faster and just as accurate by eye. I clamped the template down and cut the hole with a router using a template-following bit.


I chose not to use a hole saw for several reasons:

  • The pilot bit would have to be in the existent hole, so starting cleanly would be impossible without a drill press. I do not have a drill press.
  • Aligning the hole saw would require first aligning a template and then centering the hole saw in the template. If you have the template aligned and clamped, then the router is fast and clean.
  • I was worried about getting a clean cut on the back.
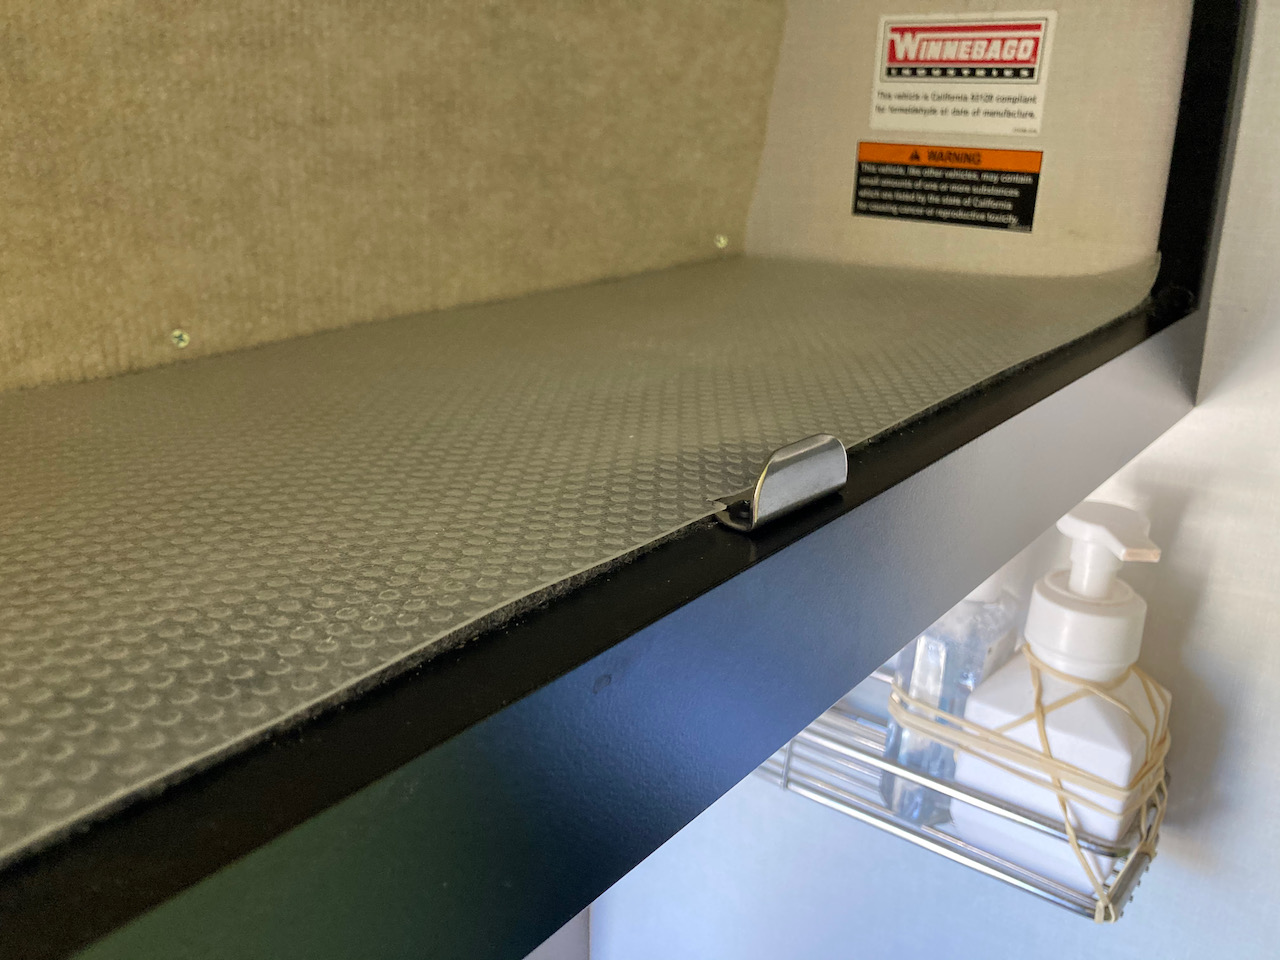
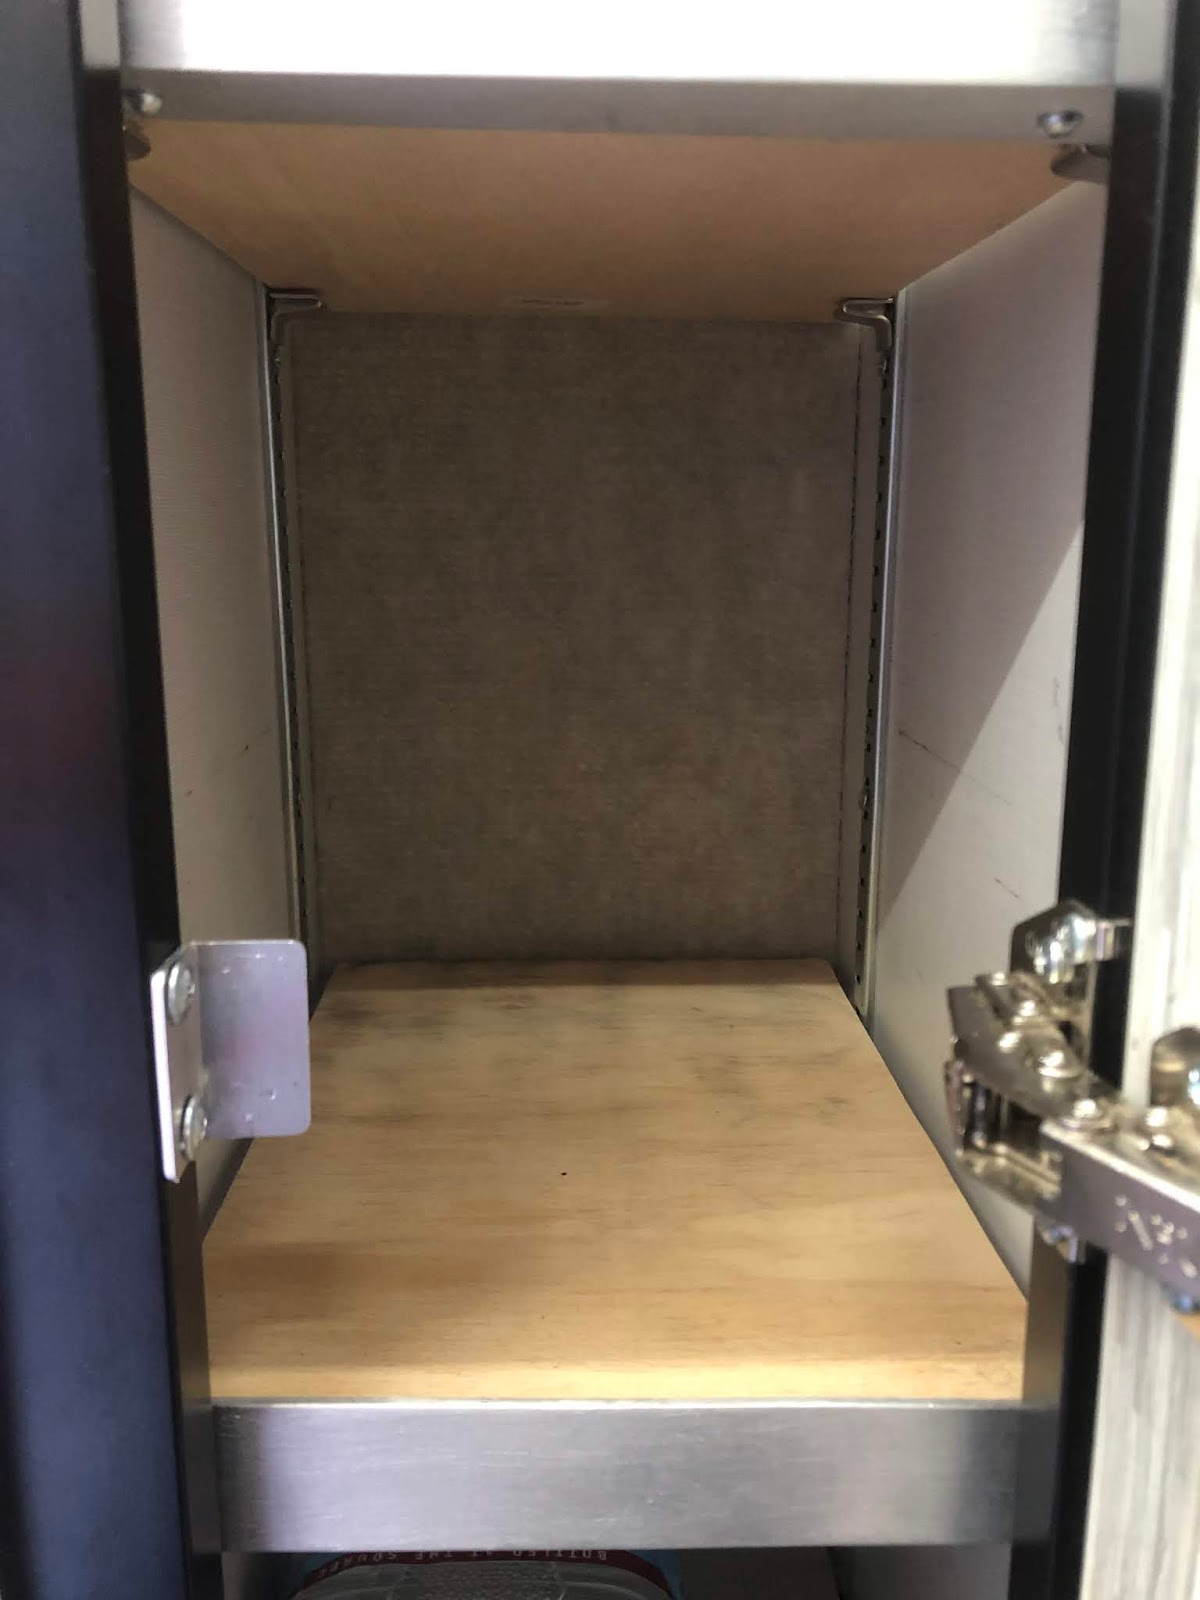

Keepers

The existing keepers will not work with the slam latches. The new keepers project more into the cabinet. Maybe an issue? The new keepers have to moved back relative to the old keepers. I had to drill new holes for the screws to hold the keepers in all three drawers and the pantry. In the overhead cabinets I was able to reuse the existing screws and holes.


BEFORE


AFTER


FINAL RESULT


Apr-14-2021

Mood Lighting for the Galley

We don't use our RAM mount under the galley cabinet, so I repurposed it for mood lighting. These inexpensive ($11) LED light strips fit perfectly into the slot in the RAM track. 


For power, I just tapped into the USB port a few inches away, and added a simple rocker switch for turning the light strip on/off. 


Oct-11-2020


Cabinet Latch Replacement

I recently upgraded the Revel's cabinet latches with Owl Vans' metal latches. It was a little bit frustrating, since 2018 Revels have an unusual latch position, and required a special catch for the latch.  Installation instructions are online, but here are a few comments from my experience.


There are 6 latches to replace, and I spent a few hours doing the replacement and adjusting them to fit properly. As ridiculous as it sounds, I found the removal of the chrome plastic discs to be a real pain, and although I tried hard to save them intact, I ended up destroying them with brute force by the 2nd or 3rd latch.


The positioning of the 2018 latch required a CUSTOM catch mechanism for $30 from Owl, and I was kind of irritated that the screw holes did not match the previous holes from Winnebago, meaning that I had to put new holes in the cabinet frame.  Not sure why this is the case - - is it somehow bad practice to reuse the holes?

Note that the new custom catch mechanism for the 2018's extends an inch or so into the cabinet opening, unlike the Winnebago version, which was tiny & minimal.


In spite of my best efforts, these latches are not quite as tight as the originals, so I added some adhesive foam pads for any vibration that I may have introduced.


It was a bit of an expense for something that is mostly aesthetic, but they do look better (IMHO), and they definitely feel better under your hand - - higher quality, and with a more durable mechanism.


2-May-2020

Pantry Hinge Spring Removal

Many of us have found that the pantry door has excessive 'snap' from the springs in the hinges. Following some others' advice, I removed the springs in the center hinges. The pantry door opens and closes with about 33% less force now, so that's an improvement.

The springs are encased in metal capsules that are easily removed with a flathead screwdriver. They will go flying when they're released, however, so put a towel or cloth up against them to dampen their trajectory, and keep your eyes closed or covered.


1-May-2020

USB Upgrade & Nightlight

It's easy to upgrade Winnebago's factory-installed USB ports to provide faster charging (NB: for non-Apple devices!), and depending on which replacement model you select, you can get a nightlight with it, too.  I chose this model for about $16, and it took about 15 minutes to install. Here are the steps I took to replace the USB ports under the galley cabinet:


Remove the two screws in the USB port's faceplate.

Remove 4 screws inside the bottom of the dinette cabinet, along the front edge.

Use a flathead screwdriver to gently pry the bottom of the cabinet up. Notice that there are staples in certain areas, so you need to gently work them out as you lift the cabinet bottom 3 inches or so.

Pull the USB port down (gently), and notice that WHITE is NEGATIVE polarity in Winnebago's wiring here. Disconnect the wiring simply by pulling.

Put the new USB port in the original faceplate, attach the new USB port to the existing wiring (Yellow is +, White is -), and put the port back in the hole in the bottom of the cabinet.  Use the new USB port's lock ring (red arrow in the above picture) to tighten it against the cabinet.

You now have new, higher powered USB ports that indicate current voltage, and the LED provides a small night light. If you don't want the night light, then you can cover it with a small amount of nail polish. Thanks to Jim Lincoln in the Revel Facebook group for the part number and inspiration!


More Storage with Nets and Elastic

My wife is always looking for a better place to store her iPad while driving, so I added a cargo net to the side of the passenger seat. It was easy to install, but it did require drilling two small holes through the steel base of the seat (I used strong zipties in the upper corners). The net I used was this one.


I also added a few elastic straps to the galley cabinet for restraining our coffee cups and a small bamboo cutting board.


Drawers

This is our early attempt at using the galley drawers in the Revel. As the months have progressed, we have made some refinements, but it's basically what you see here.


This smallest, lower drawer is holding atmospherics, like candles, LEDs, Xmas lights, etc.