Showing posts with label exterior. Show all posts

Outdoor Shower Curtain

We prefer to use the outdoor shower when we can, and occasionally we're in a place where we need to have a shower curtain. After disastrous jerry-rigged tarp & magnet contraptions, I decided to buy this nice outdoor shower curtain from Vannon.com. It installs in about 10 minutes with a few small pilot holes in the plastic on the rear doors, and fits perfectly. It's well-made, and requires about 30 seconds to set up and take down.


It requires two small holes in each door for the twist fasteners.


It has a shock cord for maintaining tension and flexing with the doors.


It uses a magnetic strap on each door to keep the bottom of the curtain from blowing around.


A view from inside the shower area.


27-April-2022 

Roof Rack Replacement

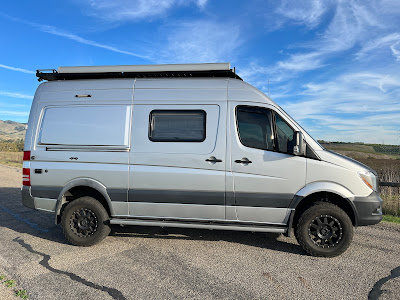
We finally replaced our original Summit rack with a Front Runner Slimline II rack. It's a pretty big job, so the fine folks at Canyon Adventure Vans sold us the rack and installed it for us. We've got a lot more space to serve as an observation deck, for storing gear, and for providing full shade on the van's roof during sunny days. So much more stable than the old one! We intend to find a smaller high wattage solar panel to replace the current 100 watt panel that we left up there. (We have a high capacity lithium system, so it's less critical for us.)


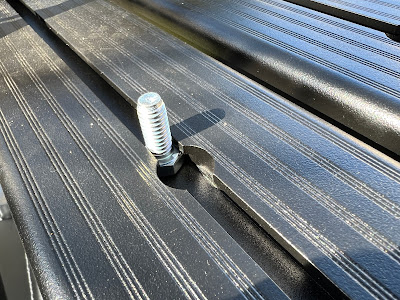
Rack attaches to OEM rack rails.


The slots require 5/16" stainless steel bolts (3/4" - 1" long) for attaching items to the slats.


12-November-2021


XM Antenna Relocation & Roof Port

I needed to relocate my XM antenna by about 6 inches, so I went up on the roof to pull a little bit of extra coax through. In order to do that, I had to remove the antenna and the steel plate below it. 


I removed the lap sealant with a heat gun and a putty knife, finding that the steel plate had rusted in a few places. It was affixed to the van with 4 self-drilling screws and a thin layer of lap sealant.


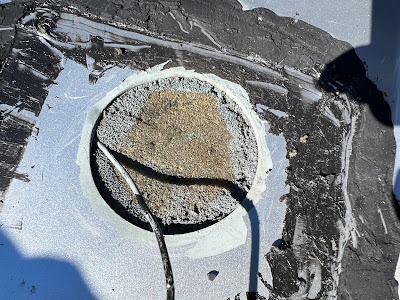
After removing the screws and prying the plate up, I found a 3-inch hole in the roof with the XM antenna wire running through it. I also found another 6 inches of wire that I was able to pull through the hole, thus giving me enough slack to relocate the antenna. Success!


I also found a fair amount of rust on the exposed steel that Winnebago left untreated. Based on what I could see, I think that the rust was caused by moisture/condensation from inside the van, rather than water penetrating the lap sealant from the outside. However, unlike Winnebago, I couldn't leave this steel untreated, and the 'port lid' was in poor shape, too. 


Look familiar?


I used sandpaper to clear the rust off, then covered the formerly rusted areas with Rustoleum Cold Galvanizing Compound. I also coated the 'port lid' with a rubberized spray that is used for wheel wells.


Finally, I completely covered the port lid with Dicor Self Leveling Lap Sealant. The one piece that I didn't fix was the self-drilling screws that Winnebago used - - I should have replaced them with slightly larger stainless steel screws, but I was in a hurry and didn't do it. Shame.


27-Oct-2021

WeatherTech Wind & Rain Deflectors

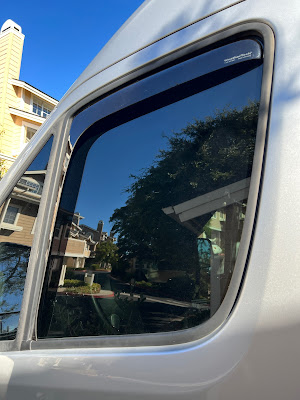
We liked our WeatherTech Wind & Rain Deflectors on our Eurovan Camper, and found them to lower the wind noise when the windows are down. We're giving them a try on the Sprinter from EuroCampers.com.


26-Oct-2021

Hinge Eye Bolts

It can be useful to hang clotheslines, tarps, and other items from the back of the van when camping, so I've added eye bolts to the rear hinges to serve as attachment points. 

This required the following items:


Thanks to Jim Lincoln, Ralph Hill, and Marcus Hammitt for sharing knowledge & parts list!


23-Oct-2021


Replacing the Revel Exhaust

I've always hated what Winnebago did to the exhaust system on the Revel, and was very glad to remove it. I've now got the restored, original exhaust that Mercedes ships with the Sprinter. It was about $250 in parts, and was an easy installation.


We added plenty of heat shield to protect the glycol and water lines in the area. (The heat shield is $45 from Mercedes, part number 9064913730. It requires a little modificationtowards the rear, near the water lines, you have give it a slight curve so that it fits better. Then use existing self tapping screws from the old heat shield to secure the new one.) 


No more ugly, incongruous pipe hanging down there to get smashed against rocks.


19-July-2021

Rear Differential Skid Plate

We get offroad a fair amount, and are often concerned about the rear differential getting struck by debris. We finally got a Van Compass skid plate to cover it. It's an easy installation and not very expensive for the peace of mind that it offers.


19-July-2021

Offroad Lighting

In the past 4 years of owning our Revel, we've had many night drives on lonely country roads with deer, elk, bison, and other hazards in our way. For those times, we've often envied the folks with serious offroad lighting, like lightbars and flood lights, and finally decided to do something about it.

Our friend Carol has some very nice Baja Designs Squadron Pro lights that she purchased from Agile Offroad, but unfortunately they no longer make this for our 2017 Revel (NCV3). However, with the help of our friends Tony & Wanda Loeza at San Carlos German Motor Works, we were able to reproduce the system from various places. 

We've now used them a few times and they are seriously BRIGHT. You can't use these lights in traffic, and if you want to do that, you should get the SAE version.


The light scuffing in the rubber pad in front of the bracket is due to the slight modifications that we needed to make for the NCV3 Sprinter


We love the professional, factory-style buttons that come with the wiring harness. The left button controls the white lights, and the right button controls the amber lights.


18-July-2021